Guitar Racks (2/2)
I looked at a lot of multi-guitar stands on the internets, and found they all have the same flaw: they do nothing to protect the guitars from each other. In other words, what every single design I could find amounted to is a sure way to scratch up one guitar with another guitar, or scratch up many guitars all at once. All you need is a clumsy dog, a six-year-old, or a careless bump with a vacuum cleaner, and there is nothing to prevent them from slamming into each other. If I want that, I can simply lean them all against a wall, no need to spend money on it.
The problem stems from trying to build a rack that will hold anything, from a slim Stratocaster to a fat acoustic, from a wide hollow-body to a narrow SG. There is no way to allow for all those variations and simultaneously achieve secure storage and volumetric efficiency ( how's that for engineer-speak? ) So I took a different approach. My rack is designed to fit a standard body size that is approximated by a solid-body Fender. Coincidentally, I have a herd of Stratocaster basses I built that need a home.
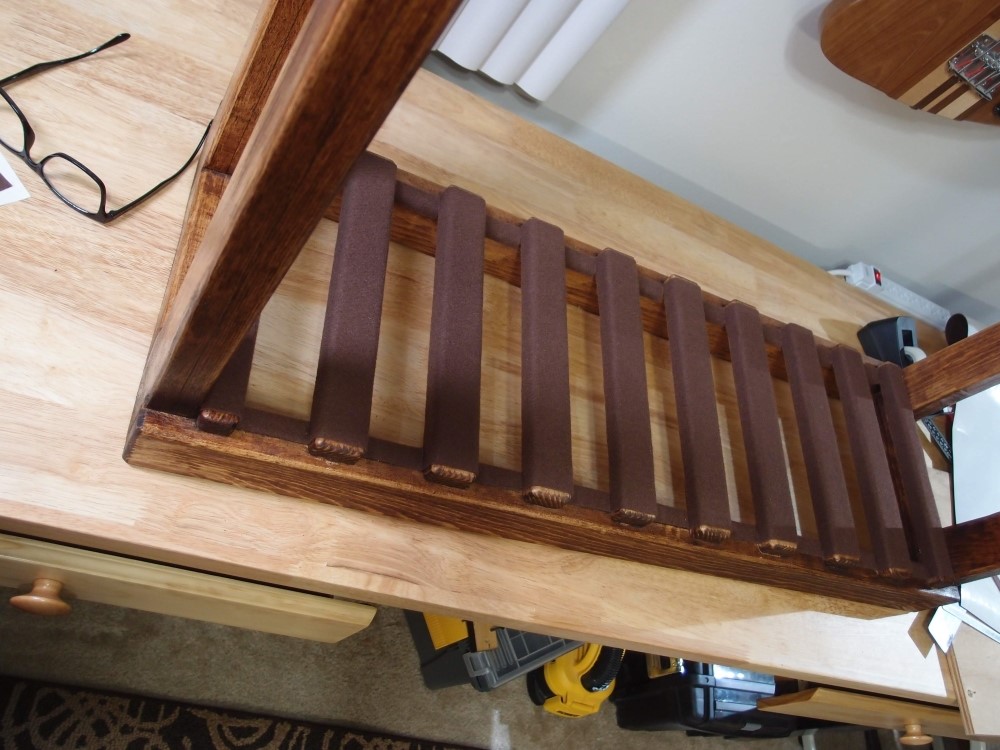
You can see that the bottom of the rack has ~2" slots that snugly hold each body, with a ~1-1/2" spacer in-between each one. This ensures that no matter what happens, the contents can never come in contact. Even if two guitars face each other, the knobs cannot touch, although you do have to remove tremolo arms. Similarly, the "comb" for the necks is fairly tight and allows little movement. I am not depending on a guitar's lean to hold it in place - the guitars are basically vertical and cannot move.
A simple removable bar across the front of the comb prevents the contents from rotating out accidentally. Short of completely upending the rack, there is no way that one guitar could come in contact with another. The spacing is more than adequate to remove and replace individual guitars, and the back of the comb forms a bin for small parts storage, like those tremolo arms.
Construction is entirely 1" southern yellow pine, dimensional lumber in various standard widths, cut to length with a mitre saw. ( Home Depot 'Radiata' pine is a good substitute for yellow. Super-soft white pine is not. ) All cuts and joints are 90 degrees. The top shelf is assembled with biscuits, the legs are assembled with lap joints at the corners. The top-to-leg joint is a bit tricky and is the only place that uses screws, all other joints are Titebond glue. The legs are two pieces of wood glued together to resist warping. The top looks like a double thickness of wood, but the edges are just narrow facing pieces. The entire construction is surprisingly light and extremely stiff and strong. I have never had one of these pieces warp in any way, neither the shelves nor the legs.
I made maximum use of less expensive materials. Only the top surface of the shelf and the main part of the comb are expensive #1-grade material. The legs and other framing and everything else is 3" or 2" 'clear' pine, which is not #1 grade, but indistinguishable if you pick and choose your pieces and cut around any knots. The 3" material is $.68/foot; while 4" #1 costs $1.59/foot. This is not only a cost savings of almost 60% but a weight savings of over 25%, with perfectly adequate strength. One rack uses almost 60 feet of 3" material, switching to 4" would add over $50 to the cost.
The comb turned out to take the longest time to build and finish. Cutting and sanding all the ins and outs was a lot more work than simply gluing up a plain shelf. The surfaces and joints of the major assemblies are smoothed with a #36 belt on a belt sander. Similar parts are clamped together before sanding so they come out uniform. The #36 belt really tears through pine, it pretty quickly grinds all the clamped-together parts to a uniform size and shape and smooths out any uneven joints. Exposed edges are then rounded-over with a 1/4" router bit, and all surfaces are sanded along the grain to 80-grit and left that way. It takes a deft hand with a belt sander to get a nice even scratched finish.
For the final finish, I applied a coat of 'natural' stain as a pre-treatment. Wood sanded to 80-grit drinks up stain, and even the lightest color will turn very dark, especially any end-grain. The pre-stain clogs up the wood grain and prevents it from absorbing too much color. Then I applied a coat of stain from a can I had standing around. I have never seen wood stain match the color on the can, so it really doesn't matter what 'color' the stain is. As near as I can tell, there may be 30 different shades of brown on the shelf in the store, but they are all either light brown or dark brown, and without proper pre-treatment, they are all dark brown.
In this case, the natural stain didn't work as well as actual pre-stain, I ended up sanding and re-staining some parts to get it all even. Before the stain dried, I applied a coat of Danish oil, which smoothed it out some more. and in my experience, stain fades and mellows over the years. It will eventually get several coats of Danish oil on the parts that show. The resulting finish is ready for the real world - you can bang it up, sand it down, and re-oil to be like new.
The bottom rack will be fully lined with self-adhesive felt. The neck comb is just smooth bare wood. Any pine is much softer than finished maple and is not going to mar the necks, and there is almost no force there. The guitars rest on their body sides on the bottom frame rails. There is no foam rubber or anything else other than felt and unfinished wood touching the guitars, so this rack should even be safe for lacquered finishes. As safe as anything anyway, I don't think there is a way of storing a lacquered finish that won't ultimately damage it. The comb is attached with screws only, so it can be re-positioned up or down if necessary.
I started out building two of these to hold 9 guitars each. There is just enough height to fit in even a full-scale bass, although that was not one of my original requirements. Since anything worth doing is worth overdoing, I decided to build a third one to hold the other sizes. That one ended up completely different, I will add it here when it is done.
The total cost for both of these racks came to about $120 each. That's a lot cheaper than any bought rack I could find, even if there was one that was acceptable, which there isn't. You could probably do the whole thing with only a drill, jigsaw, and belt sander. Mitre saw and router are helpful but not necessary, the belt sander will clean up all kinds of woodworking sins. All the joints are glued, but many of them can be screwed or nailed instead of clamping, and if you're clever it won't show.
You can alter the rack spacing to suit yourself, or attach the body spacers with screws so they are removable. The comb could be built up from multiple pieces of wood instead of cutting it out as I did. Finally, for an absolutely minimal design, you could omit the top shelf, shorten the legs and use the comb as the top brace. That would cut the cost and the work in half, and still be better than anything you can buy.
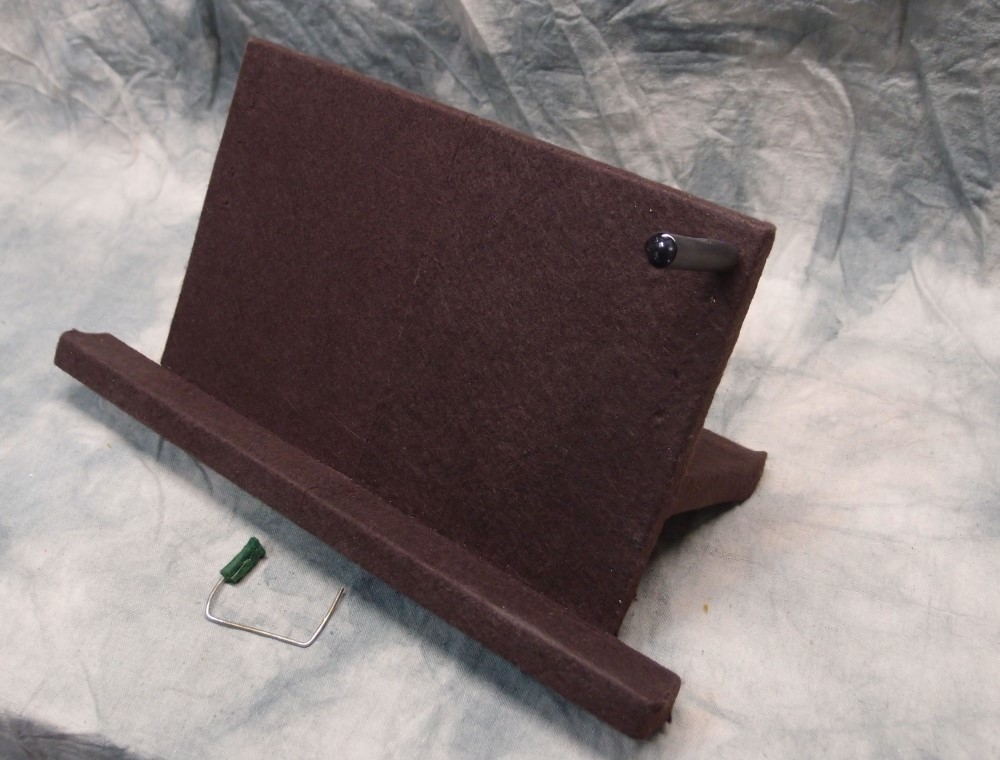
Here is the bottom section all done. Cutting the felt requires a very sharp razor. The way I'm feeling, even that could be risky, but I got through it with all my fingers. ( A piece of advice from the other day: Never ever touch the table saw blade. Nothing good can come of it. Thumb is healing up nicely though. ) Here is a shot of how I made the cuts:
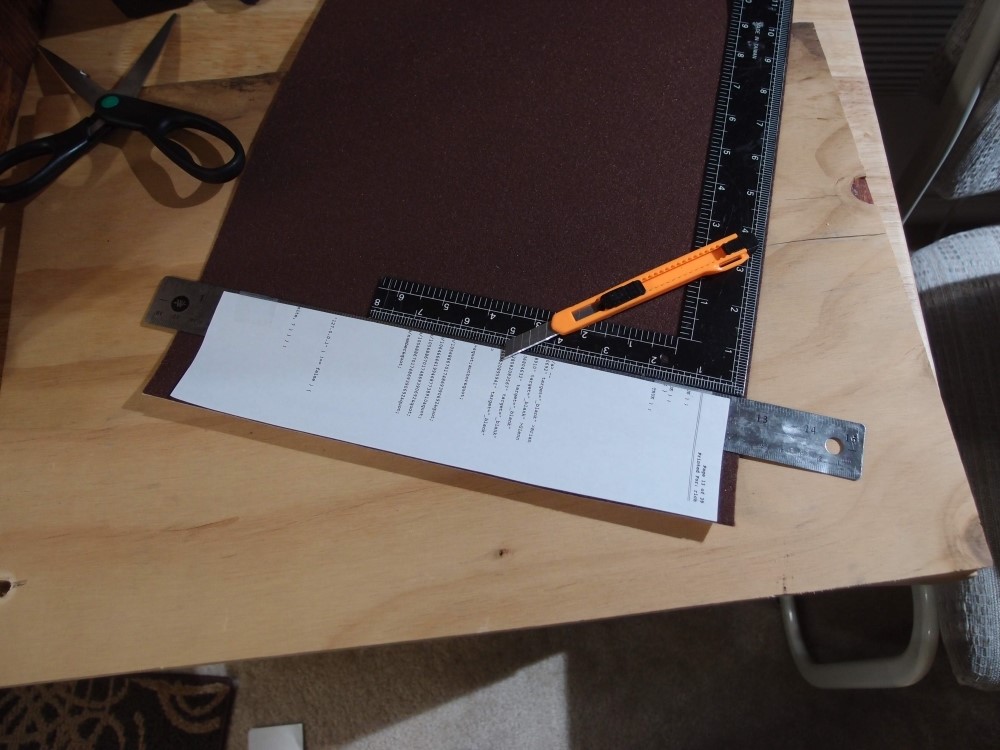
The ruler has a piece of paper attached to set the width. True up every cut with the square, otherwise, your errors will accumulate until it becomes a problem. I found that the felt cuts best at an angle to the grain of the cutting board. Very little went to waste, I found uses for much of the scrap, and in the end, I had lots leftover from a 12x36" sheet, so I cut 1/2" strips and did the neck comb as well. The felt comes in lots of colors, and I toyed with green or red, but finally decided on dark brown - it just disappears, so if the job is not perfect, it won't show. And there is nothing perfect about this finish, you might consider it one big flaw, which is why it wears so well and is so easy to repair.
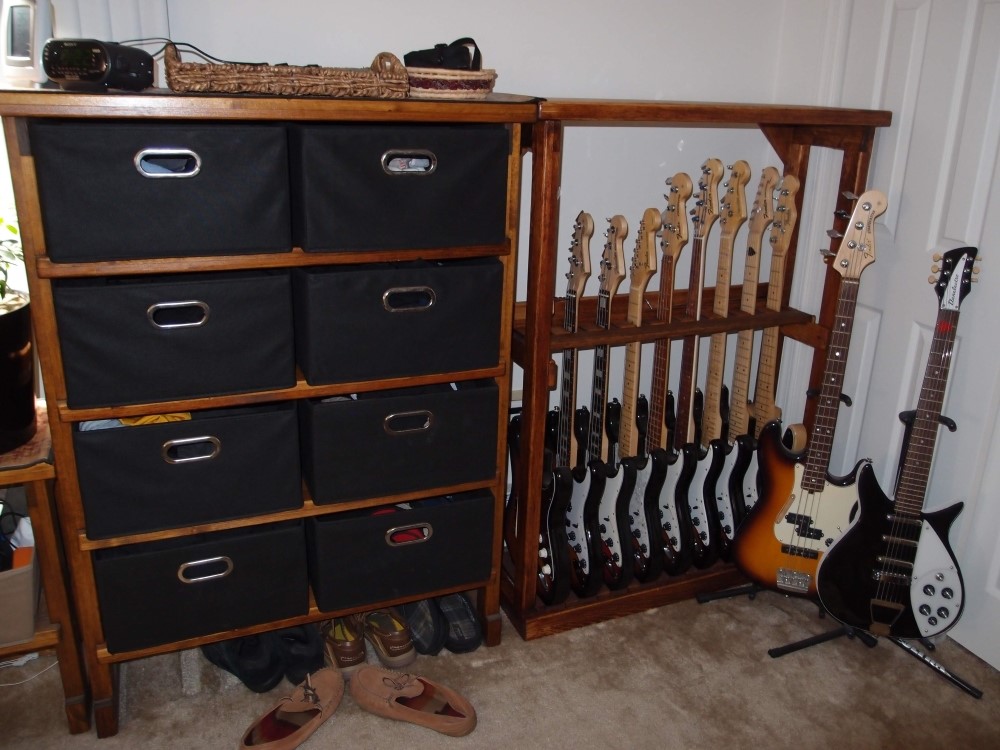
The odd Strat is out front, and you can see why it doesn't fit - the bridge is almost at the edge of the body. That's ok, the Tele can go in its place. Next to the guitar rack is the dresser I mentioned, and next to that you can see the end of one of the 'standard' modules. That basic design has proven to be incredibly adaptable. The dresser is as tightly designed as the guitar rack, with a space for shoes underneath ( the floor as a free shelf. ) The new rack replaced a forest of guitar stands that had gotten out of control. Eventually, I will place a short shelf unit on top of the guitar rack, but the finish will have to be totally dry and hardened first, a month should do.
The guitar rack is the only one of the modules with triangular corner braces. The inset shelf joints of the other models are incredibly strong and provide all the side-to-side or diagonal stiffness necessary, but the guitar rack doesn't have any. The comb is not designed as part of the main structure, it is actually adjustable. To compensate, the bottom joints of the rack are lapped and staggered for stiffness without extra bracing, which in any case would not fit with the guitar bodies. But I have my doubts about the top joints, so I added the extra braces there. The result is zero flex, the same as the other units. The empty weight is 36 pounds, about half of the expected payload. As an engineer, I had to know.
The shelf unit to the left of the rack was built and finished exactly the same way, several years ago. You can see how the finish has mellowed. Yellow pine stains very heavily, Radiata turns out to be much better. But the #2 yellow pine I used for this is very economical. If you cut around the knots, it is equal to #1 grade. I left a couple of knots in for character.
Another thing I like about all of these designs is that every part and every joint is necessary. There is nothing extra that could be taken away without compromising the structure or the function. There is also a minimum of fasteners, with almost none of them showing. Some of my earlier designs were based on things I'd seen, and for example, used solid side panels and overall heavier ( and more expensive ) construction. But for these, I boiled the design down to a bare minimum - low cost, strong, lightweight, simple, and efficient. Once an engineer, always an engineer. ( Aerospace, wouldn't you know? )
As I said, you could not pack guitars any tighter, yet they are as secure as possible while still on display and easily accessible. I like the way they all look together in perfect alignment, yet each one is unique. My "JL" has crept into the picture as well, it's been doing that lately. I suppose this is a stretch for a thread called "Building: Tools, Fixtures, Jigs & Templates," but if you build enough guitars, you're going to need a place to keep them, right?
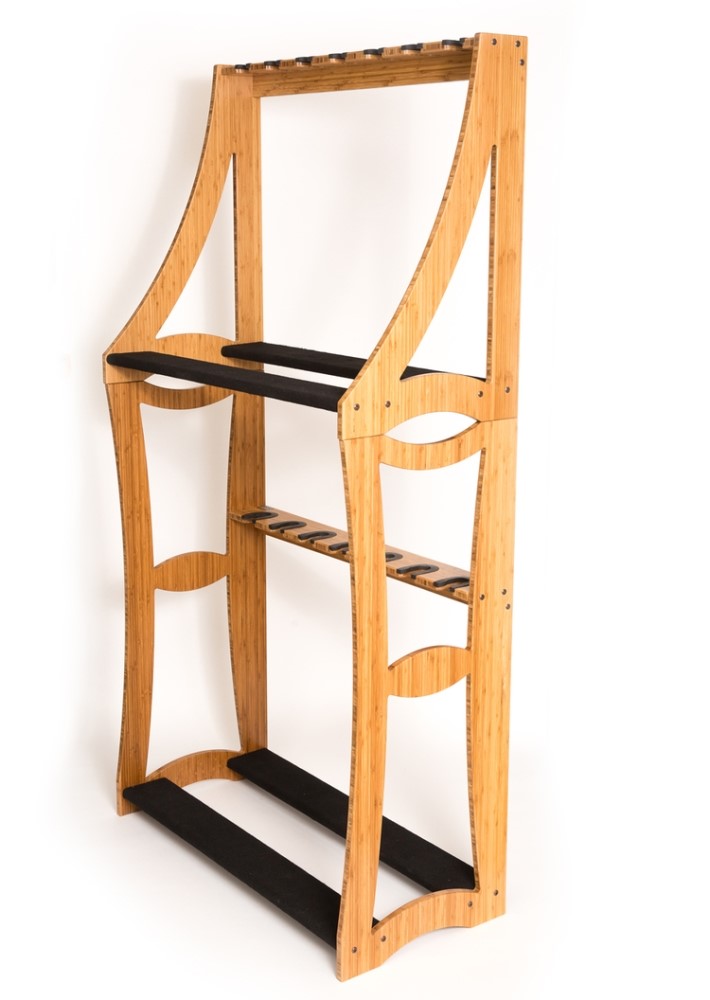
This is the closest thing I can find to my own design. For $849, this rack holds 14 guitars, although long-scale basses will only fit on the top. Doesn't look very sturdy - the extra screw in the trio seems to be the only bracing that keeps it from collapsing sideways. I'll bet it wobbles no matter how much you tighten the screws, and the cross-bar supports will sag in short order. Anything bigger than a Ukulele sticks out both the front and the back. Also lacks any means of preventing the guitars from falling out, or crashing into each other. Got kids?
This 'flat-pack' design is optimized for shipping, like Ikea stuff. The pieces fit in the smallest possible box, with the least possible weight. That is the primary design criterion, anything else that can be achieved is secondary, like securely storing guitars. And the price is breathtaking. Mine is under $200. You're much better off building your own.
Questions or Inquiries?
Just want to say Hello? Sign the .