Stratocaster Bass 1 (3/3)


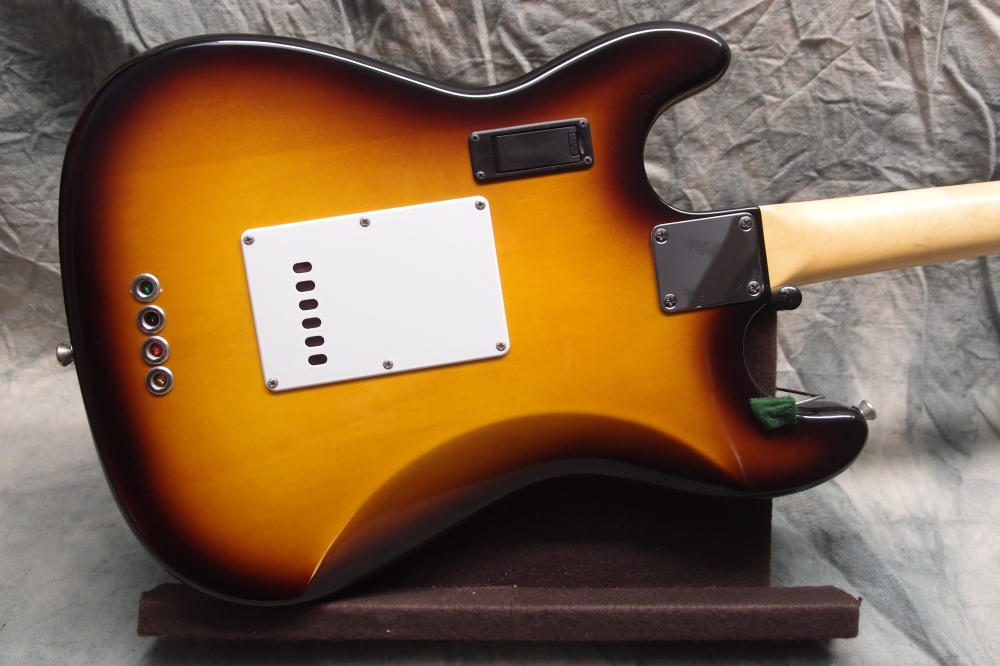

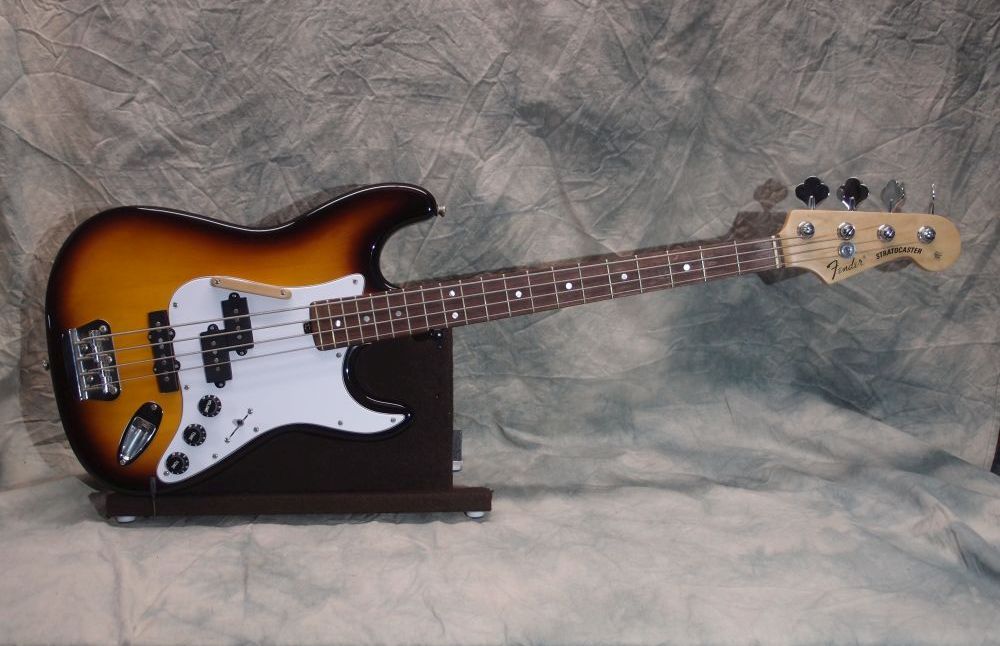
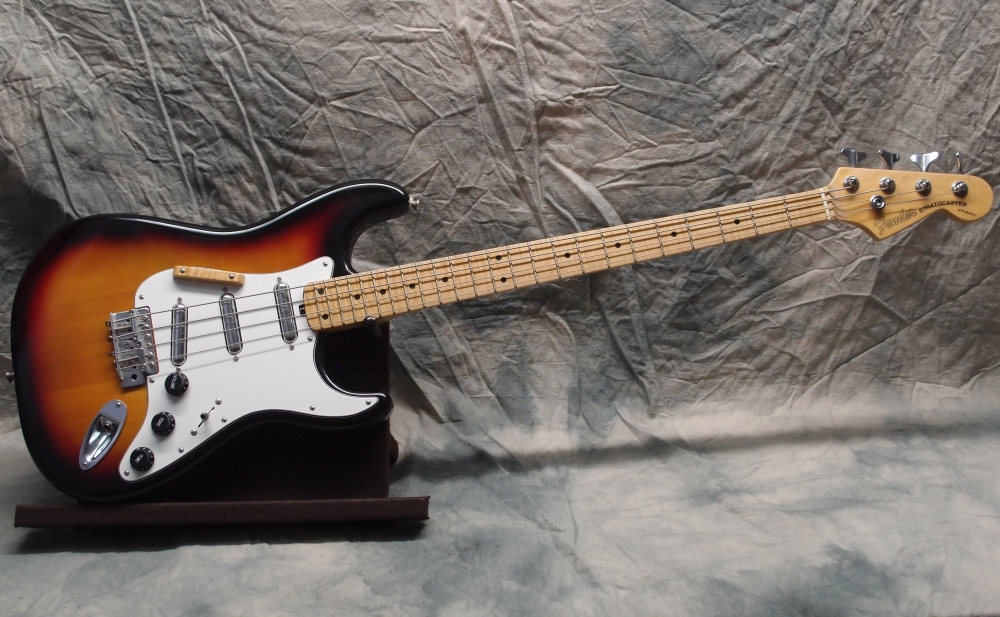
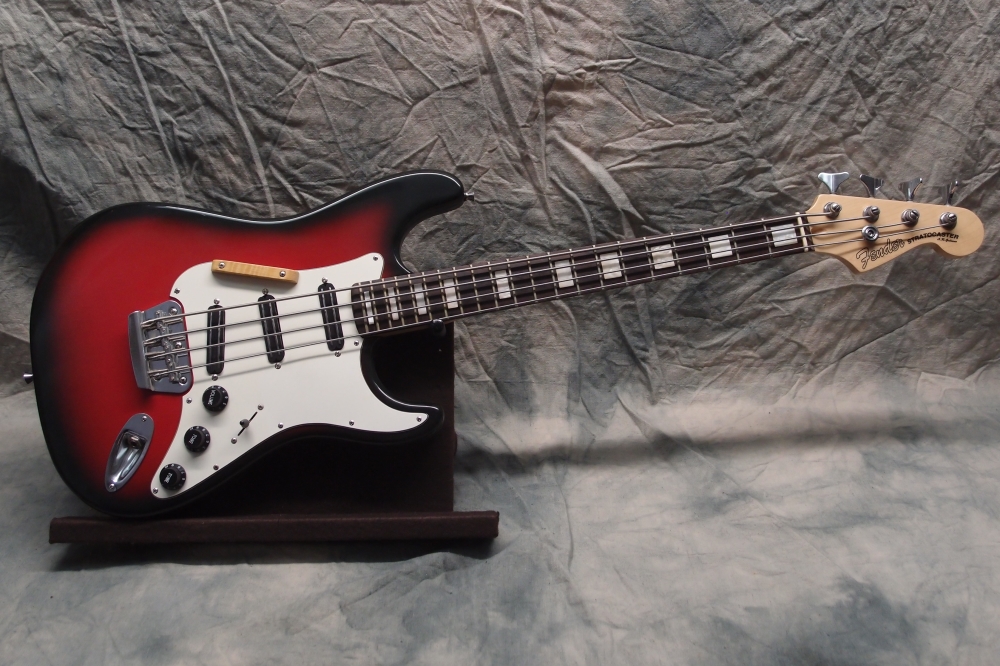
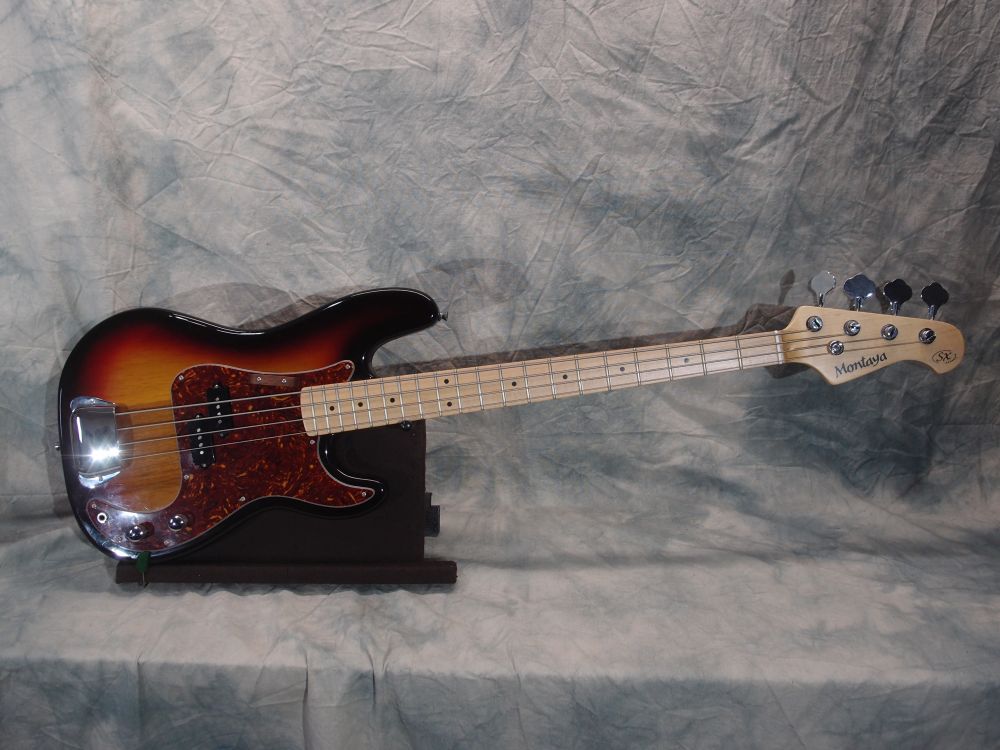
This pickguard started out white, but turned an ugly brown. In addition to the outline of the thumb rest, if you look closely, you can see the shadows of the strings. This is clearly a reaction of the material to light and air. Classic Fender pickguards are well-known for turning slightly green, or 'mint' over time, but I have never seen anything like this. Note that there is no outline of body fade around the pickguard. This guitar wasn't left in the sun, ordinary indoor light did this!
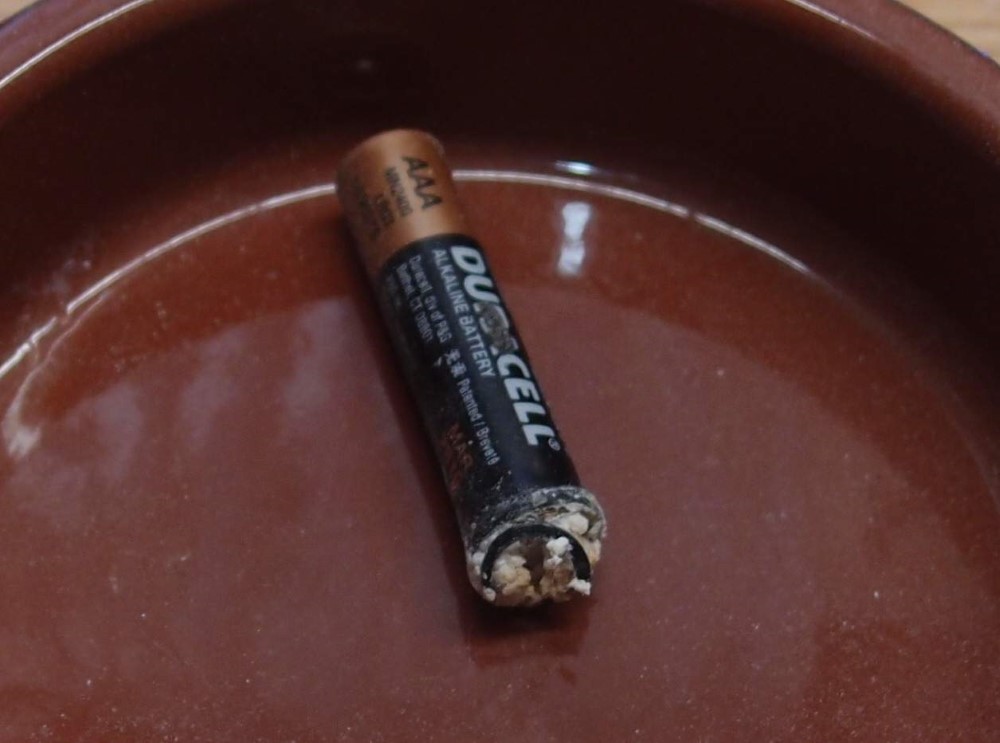
This project was done in an era of cheap parts from China, shipped free on eBay. Many of those parts were perfectly good, but many more were incredibly shoddy. Sometimes it took a while to find out, as here. That era is over, China is rocketing backwards into isolation and economic collapse, and eBay loothery is an empty shell of what it once was. From now on, we will all have to use better-quality parts made elsewhere. Funny how the under-layer stayed white - look at the outer edge. You never knew what you were getting from China - good riddance! That said, I do have a good stock of better Chinese parts for someday.
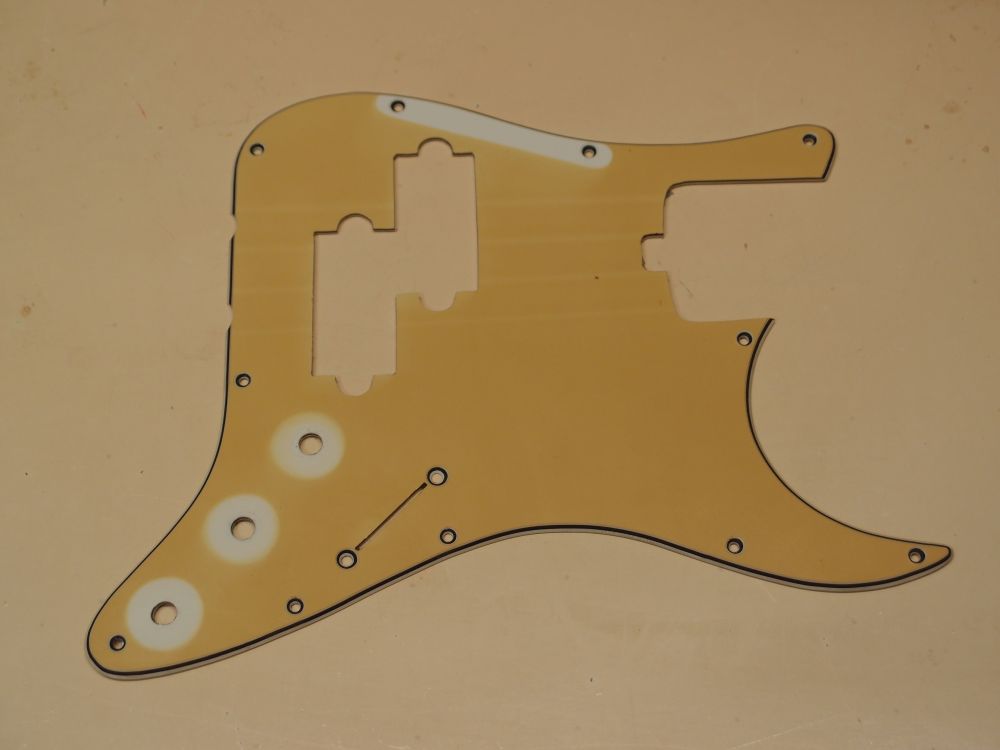
This was one of the first pickguards ever made, and still one of the most complicated. My first attempt failed when the router tore off the end of the lower horn and shot it across the room. Otherwise, I would have two brown pickguards and be twice as disgusted. The more I look at it, that brown is really awful and ruins a nice project. It looks like cardboard. I need to do something.

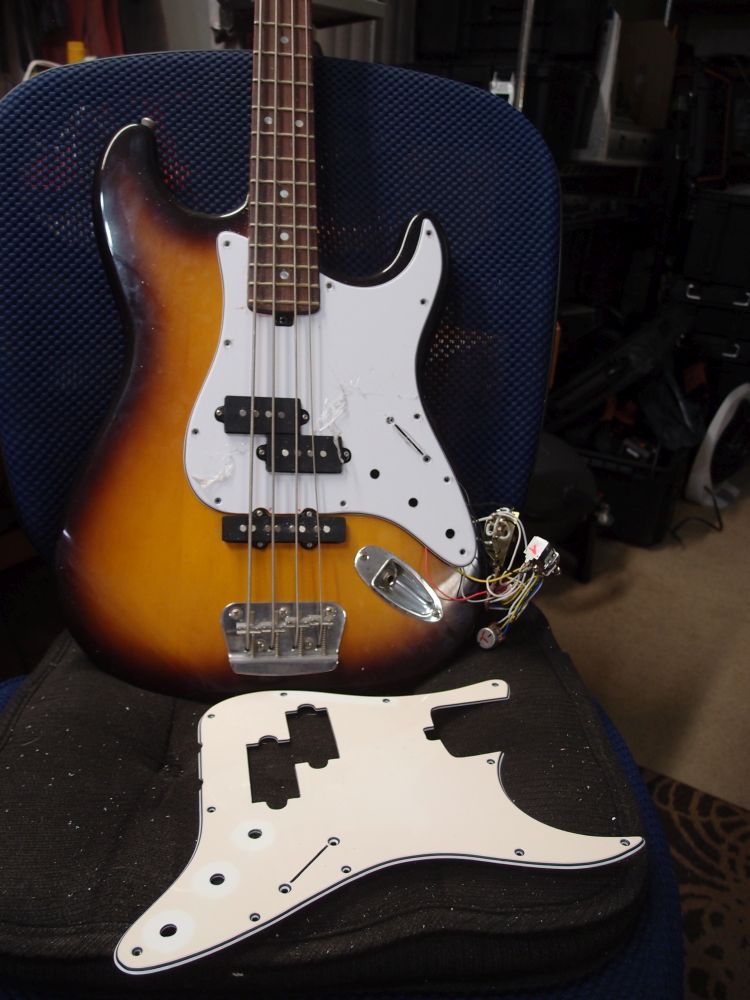
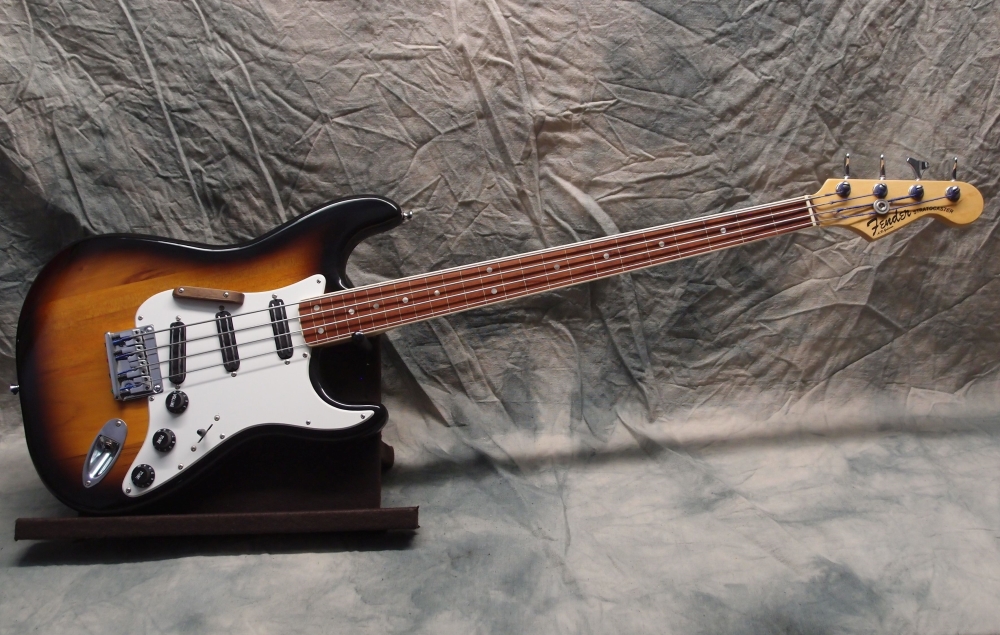
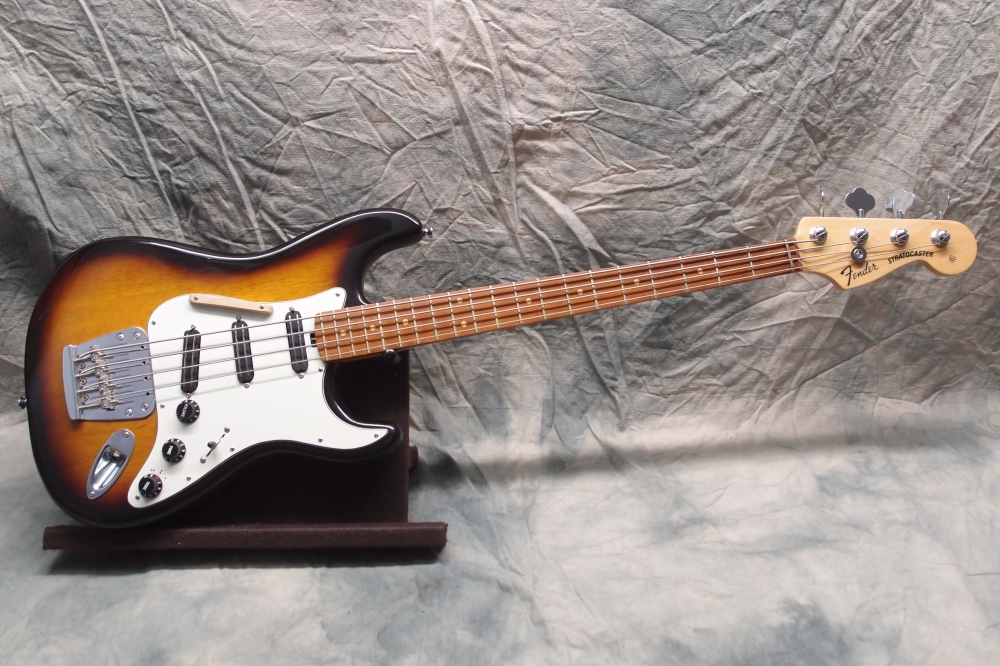
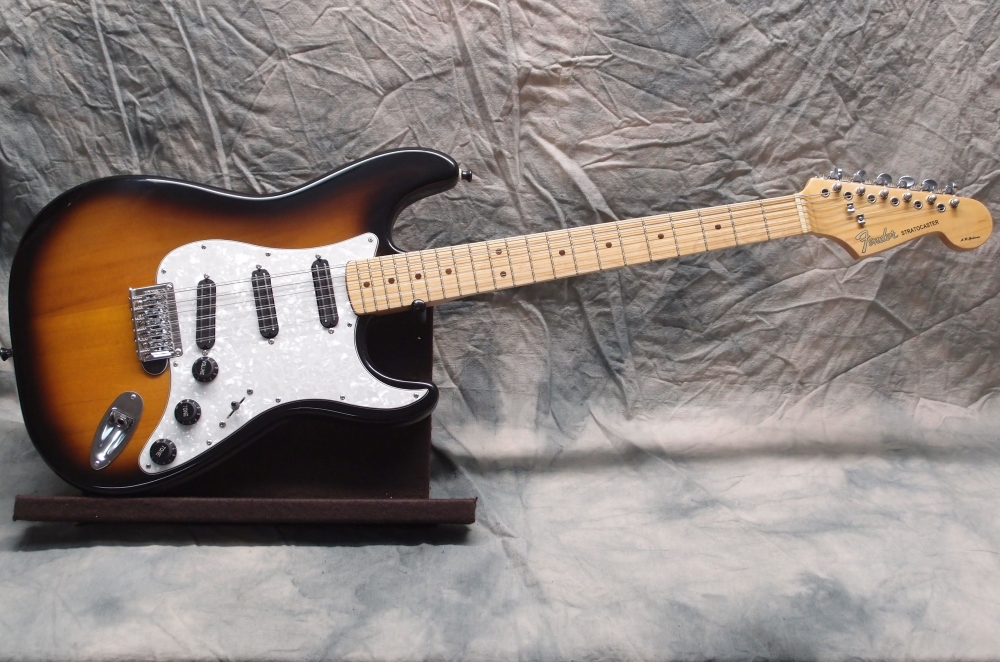
After an attempt to salvage the old pickguard with chemistry, I decided to make a new one. Above are both parts for comparison. You can see the old pickguard has faded considerably, but is still nothing like white. The new one is not finished yet, but I have had this piece of plastic in inventory for a long time; if it has not yellowed by now, it is not going to. I'll post some details of both processes later, link in the sidebar.
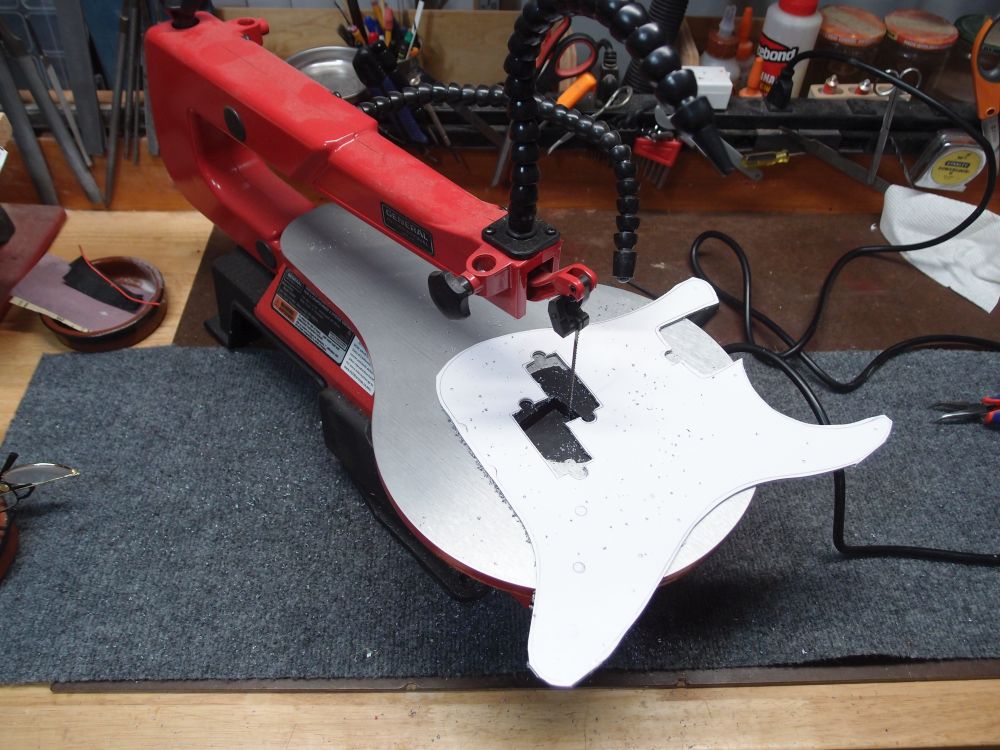
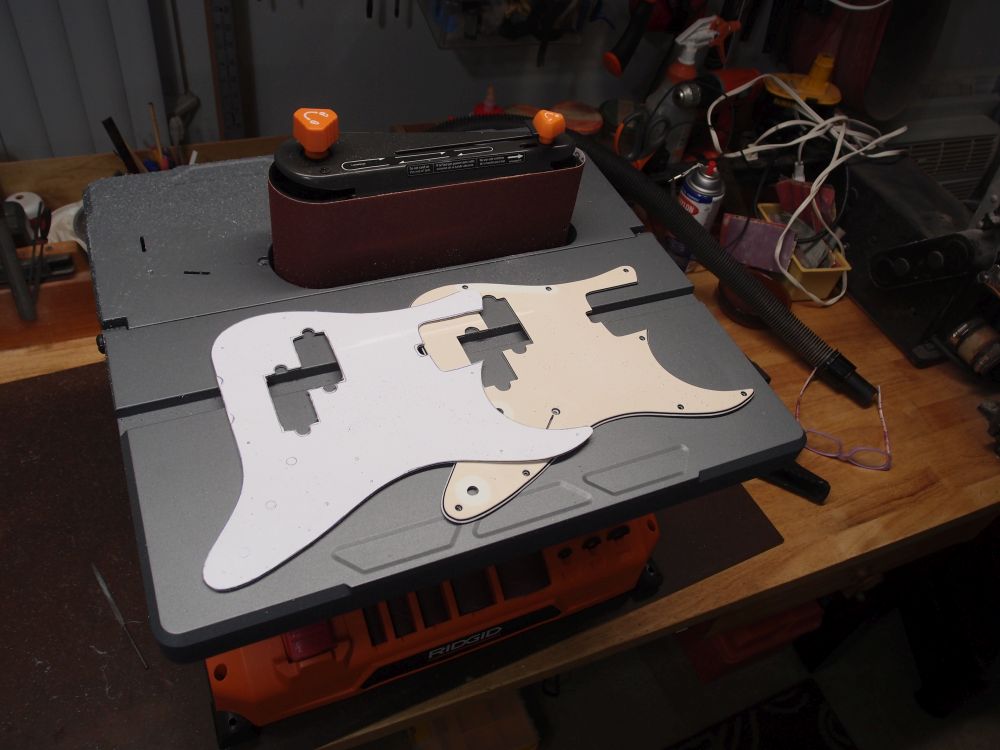
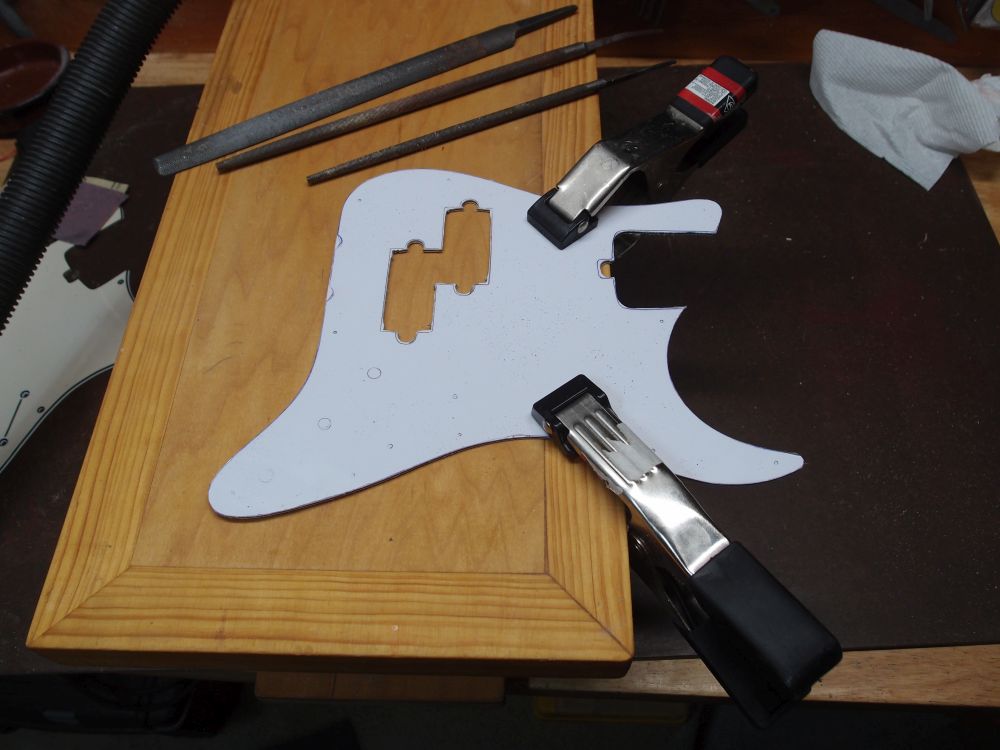
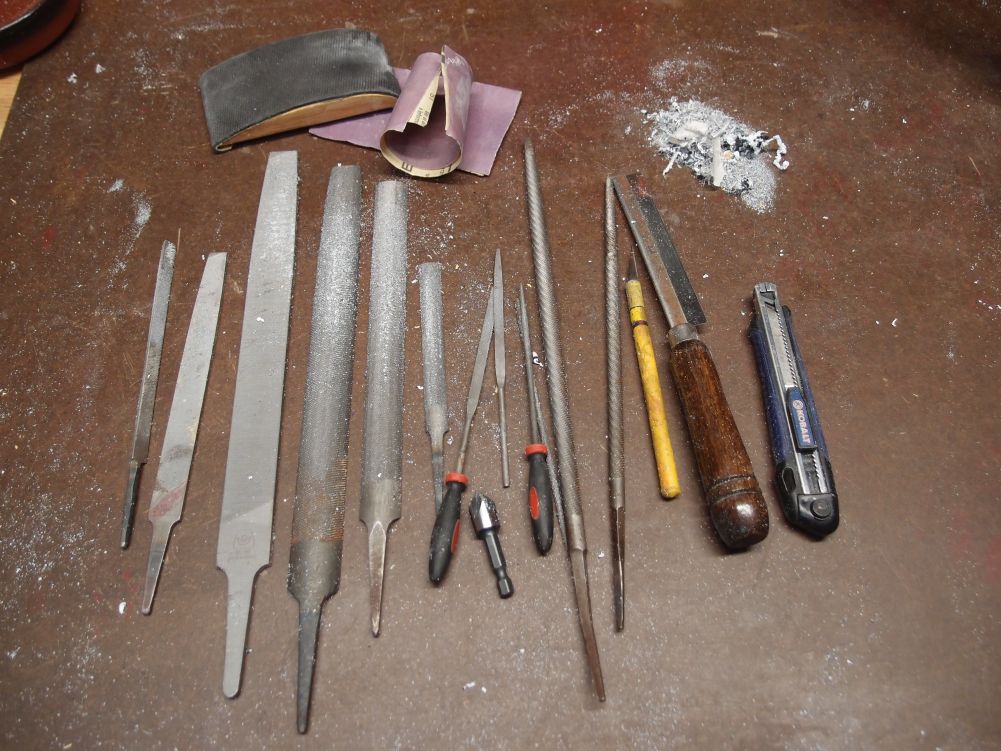
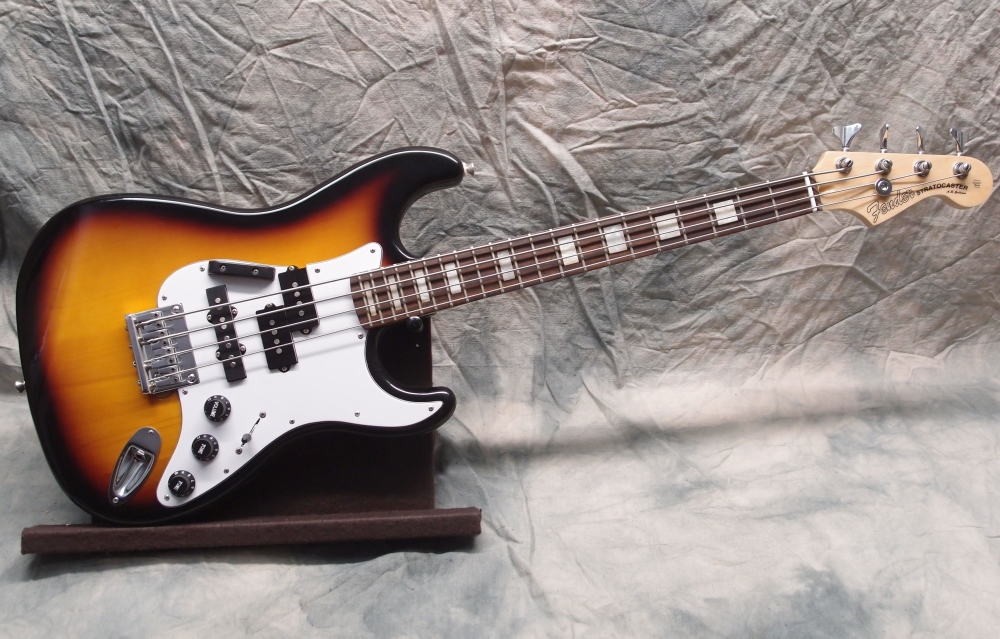
The replacement is made entirely with hand tools, using the old one for a template. This is actually relaxing, unlike the terror of routing a plastic edge. The P-pickup cutout is a lot of fussing, but the rest is simple. ( For some real P-pup torment, see my "BC Rich". ) I roughed out most of the cuts on the scroll saw, finished the outline on the belt sander, and cut the inner edges and bevels by hand with files.

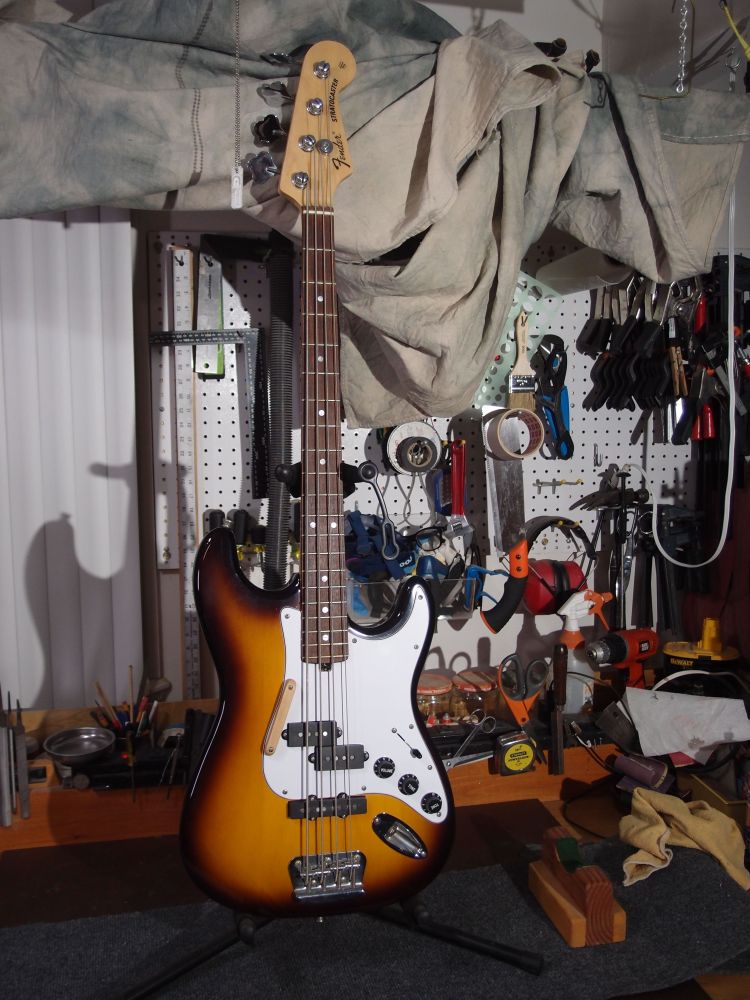
And the final result. Sound check reveals I didn't even break the wiring! I'm much happier now. This is such a fun little bass, handles perfectly, sounds great, and now pretty again. Notice how the thumbrest uses existing screw holes, and can be removed leaving no mark.

Questions or Inquiries?
Just want to say Hello? Sign the .