Work Box
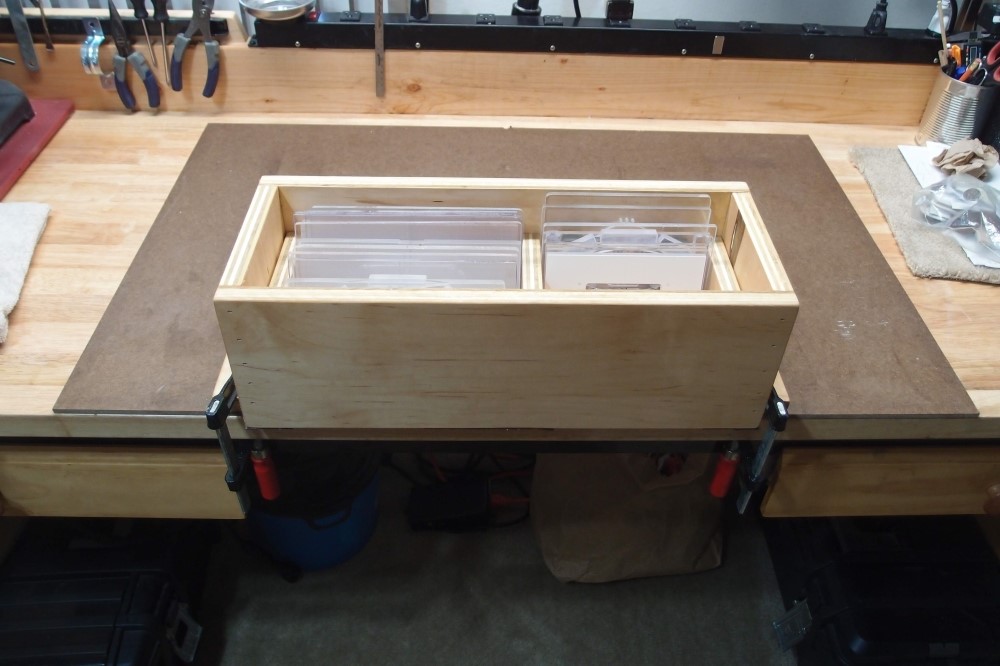
I got side-tracked onto this, and at risk of turning this into a furniture thread, I think it's worth sharing. This is just a box. It was motivated by two things:
- I often find I am filing something ( like a pickguard ) across the front edge of the workbench - a very awkward angle. I've ruined the natural spot - the right corner - with the vise - worthwhile.
- I need a place to store my growing collection of templates, which is getting pretty heavy.
So I decided to kill two birds with one stone. I sized this box around the templates, some of which I trimmed to fit, and I built it as solidly as possible from my supply of Home Depot free plywood. Above are all the templates in the box, minus the lid, which will be finished soon. You can see the flanges at the bottom, where I can clamp it to the bench. The bottom has a generous amount of non-marring self-adhesive felt, leftover from the guitar rack. In this configuration, I can grab the box and shake the bench by it. But I don't think I'll need to clamp it often, because it is going to weigh almost 20 pounds when it is complete and full of heavy plastic.
The lid offers a 1-1/2" hard wood flange all around, so not only can I clamp the box to the bench, but I can clamp workpieces to the box. The lid fits snugly on the box with some more felt. It occurs to me that the natural way to pick this up and carry it is going to be by the flanges on the lid, so I will need some way of locking the lid on. I got a pair of window sash locks that can probably be adapted to it. With the lid overhanging like that, handles on the box wouldn't work very well.
This will let me file over whatever edge works best. It also occurs to me that this will be useful for soldering small assemblies since you can raise them right up under your nose. When not in use, it will stow away under the workbench.
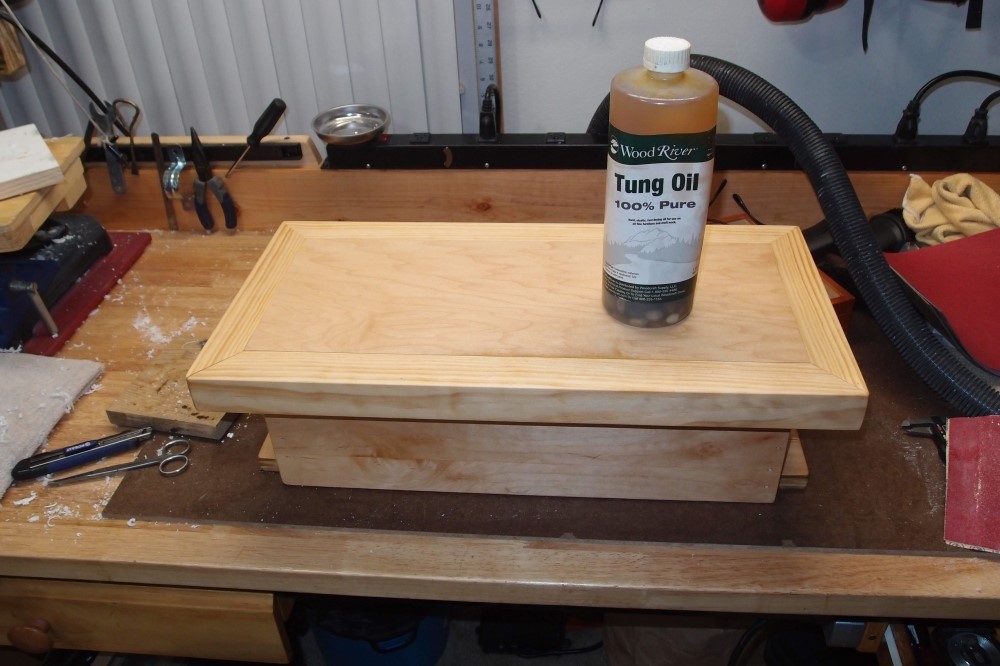
"Wow, this guy must be tetched to be posting something like this," you're probably thinking. Well, take this basic design and scale it up to maybe 24" x2 4" or 24" x 36", and you have a perfect little workstation that you can clamp to the kitchen table or countertop, and store under the bed for the 99% of the time you're not using it. You could even attach a small vise to it with bolts and wingnuts, that you could store inside, along with tools and sawdust.
Build it from a 1/4 sheet of good 3/4" plywood for the top, and dimensional lumber for the rest. I cut it all out of plywood because I have a lot of plywood, but that is a lot more work. If you want a vise, get that first, and size the box to fit it. Home Depot sells suitable pine in 4, 5, and 6 inch withs, nominally 1/2" smaller. Screws and glue for all the joints, it doesn't have to be pretty, it just has to be strong. I sanded it smooth for splinters, gave it a quick oil finish because it is going to be inside the house. There is no need to mitre the edges like I did.
Since this thread is aimed at people who have never built a guitar before, and probably don't have much of a workshop, if any, I suppose this thing actually fits in here very well. A sad note: this is really really nice plywood, and it deserved a better fate than to be turned into a junk box. Oh, and I figured out what kind of plywood it is - alder.
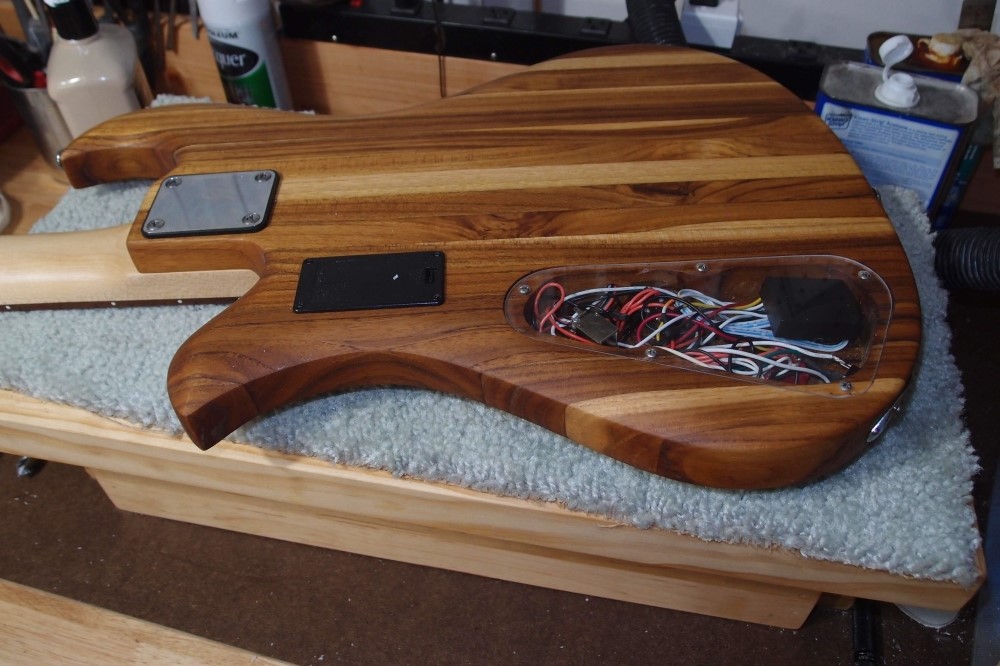
I cut a piece of carpet to fit the top of the workbox. You can buy "luthier guitar mats" for fifty bucks, but honestly, an old piece of carpet works better.
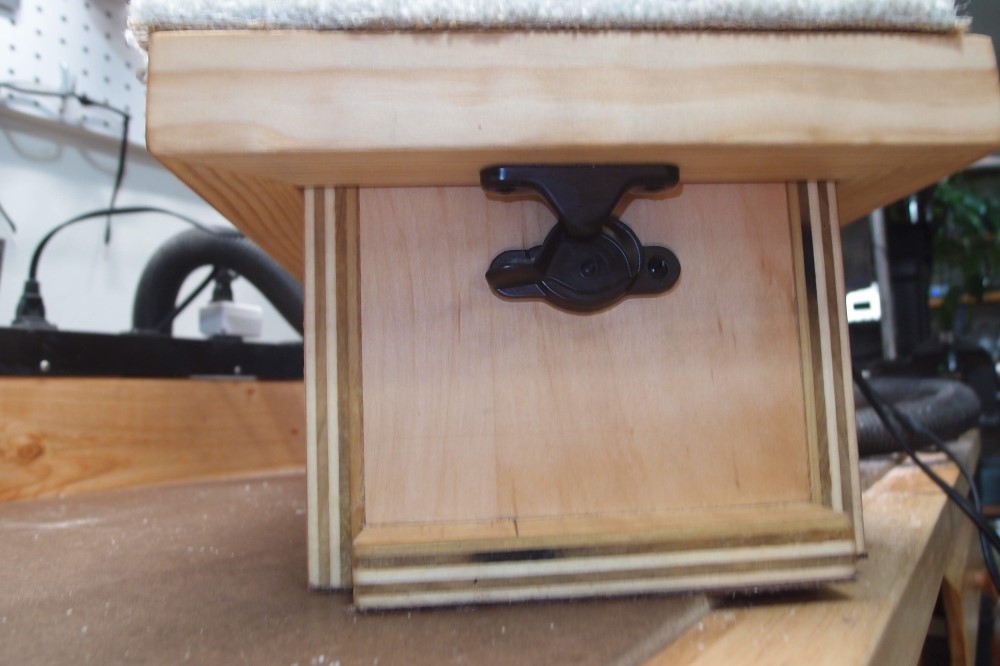
Here is how I solved the latch problem on the workbox. I ground the hook off the upper part so that I could rotate it 90 degrees from its usual mounting. One on each end will suffice for this little box. I also added some strong magnets inside to store the flat-head screws for the templates.
I keep going on about this because I really think that for someone with limited means and limited space, an enlarged version of this design would give you a pretty good workshop on the kitchen table. I've got some free handles coming which I will install below the latches, and that will be the last of it, I promise.
Questions or Inquiries?
Just want to say Hello? Sign the .