Doweling Holes
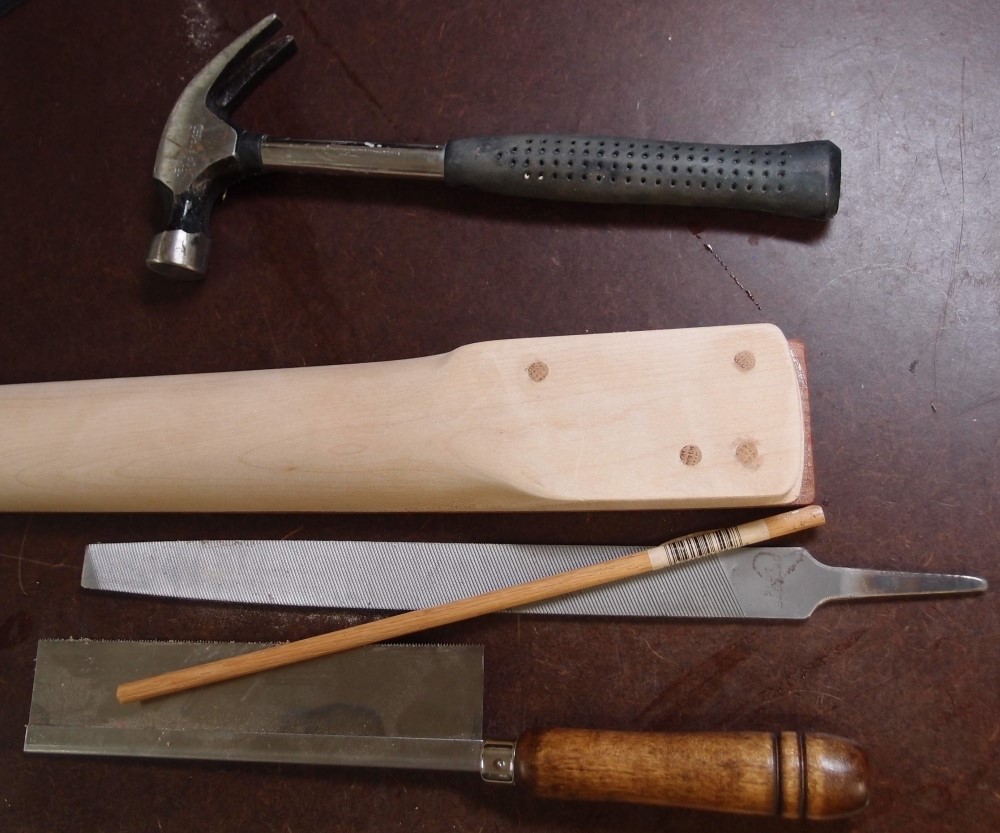
Here is a basic woodworking technique that can come in very handy when building or repairing a guitar: using dowels to repair holes. Here, I was a little too eager to drill the mounting holes. Then I found that I had to take about 3mm off the neck heel to line up with the bridge ( you can see the small maple shelf I left to support the overhanging fretboard. ) That means the new holes will be only 3mm from the old holes, practically overlapping. In fact, there is a real possibility that the drill bit would pilot its way into the old hole.
The repair is simple. I drilled out the old holes to 1/4" and glued matching dowels onto the enlarged holes, then filed them off flush. Use a dowel that matches the hardness of the material you are repairing, in this case, hard maple, so I used an oak dowel. If it was a softer wood like alder or poplar, I would use a pine dowel. I can now drill right down the edge of the dowel if I have to, and the bit won't pull over into the softer wood.
In this case, I am doweling the old holes because the new ones will be very close by, but this technique can also be used to repair a stripped hole. Screwing into end grain is not the best thing to do, but since the dowel is tightly fitted ( I had to hammer them in ) and glued into the surrounding wood, it is not a problem. Now I can re-drill and mount this neck, and no one will ever know.
There's something else here too: don't overlook the use of files in woodwork. Many things that you might think to sand can be better done with files. Whenever you want something flush, or a long straight edge, or a smooth outside curve, think of using a file instead of sandpaper.
Questions or Inquiries?
Just want to say Hello? Sign the .