Benchtop Belt Sander

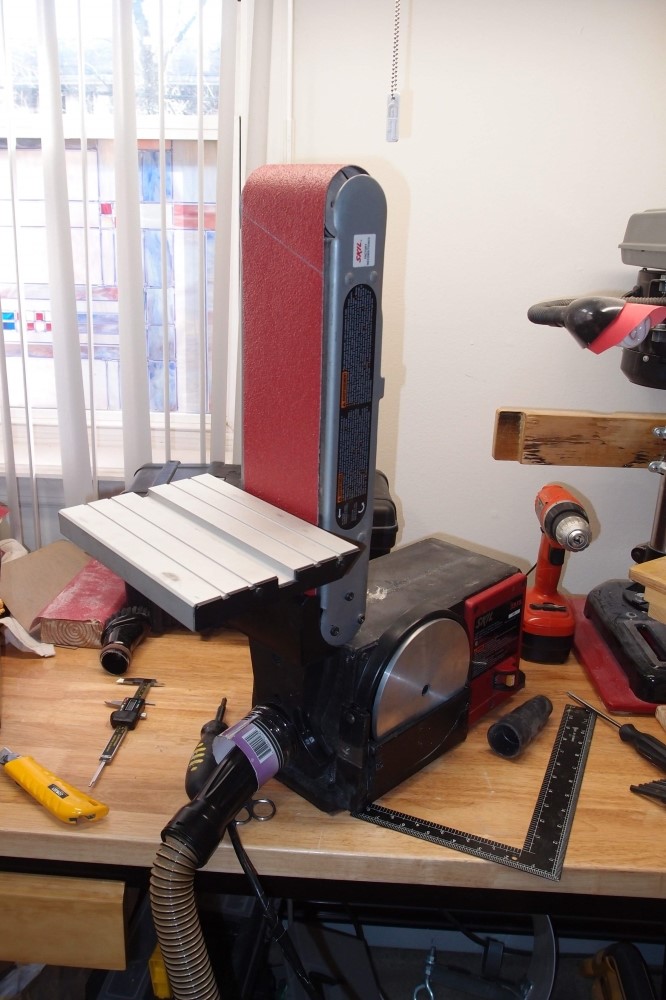
Here is my bench-top belt sander, rotated up vertical. I've never been very impressed with this thing, and it has seen very little use, especially since I got the oscillating sander. But I thought I'd get it out and see what it might be good for. You can see there is no abrasive on the sanding disk. The disk doesn't do anything the belt can't do much better. Sooner or later though, you will forget it is there spinning away, and find it with a knuckle or finger - ouch. At some point, it also tore up the power cord. I took the disk off to clean it, and I was tempted to leave it off - the spinning nub is much less dangerous. But the back of the disk is the cooling fan for the motor, so I put it back. The smooth aluminum is fairly safe.
I forgot you could mount the table to the belt. That makes it actually useful, and I spent some time getting it all squared up. Finally, I need to do something about the dust collection port. It is useless. A stroll down the plumbing aisle and maybe I can come up with some kind of adapter. I also mounted a new 50-grit belt, which really tears through wood for rough shaping. Just remember to leave yourself 1/16" or so to sand out the gouges with a finer grit.
In the vertical position, the motion is downward, which works well, but in the horizontal position the end roller throws all the sawdust up in your face. I ended up disassembling the table and dust collector so I could use the back roller, which at least throws all the junk downward. Even then, I would recommend using a handheld for this sort of work instead. The reason is that with a handheld sander, you set the piece down and you can see what you are doing. On the bench sander, you have to hold the piece upside down and blocking your view, and it is very difficult to tell what you are doing. You could easily do something regrettable.
The bench sander is a lot smaller and a lot cheaper than the oscillating sander, which makes it a good candidate for a kitchen table workshop. With the right technique, you can probably do all the same things on it, like shaping bodies and necks. It does make an awful mess though. Switch to a sanding drum on the drill press for smaller details. You want to make minimal use of the drill press for sanding, the bearings are not made for side loads and you will ruin the tool if you overdo it.

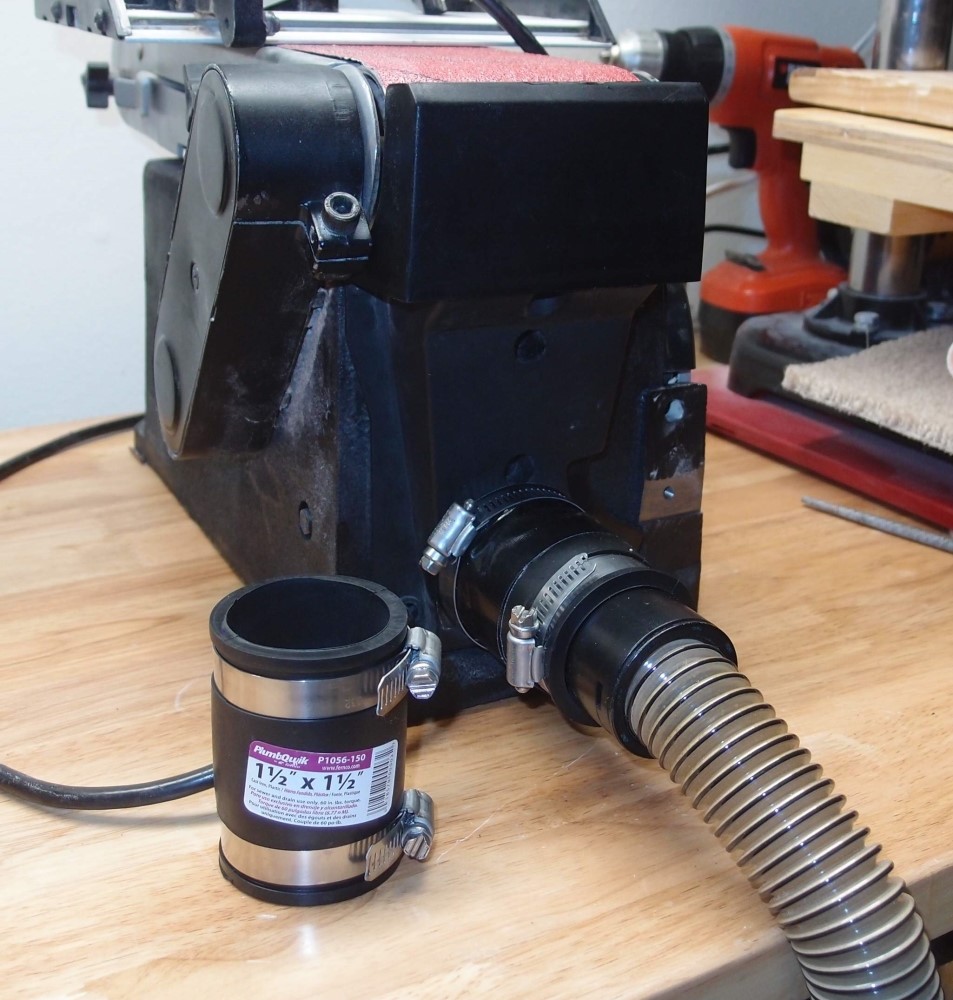
I got two of these rubber couplers in the plumbing aisle at Home Depot for about 4 bucks each. It fits tightly inside the 2" dust port, and then the hose of my house vac fits inside the coupler, which can be adjusted with the clamp. I used the other hose clamp and some duck tape to make it secure. Inside, the duct ( not duck ) splits to serve both the belt and the disk; I blocked off the disk part so all the suction now goes to the belt. This is about as better as I can make it. The second coupler is for the oscillating sander. These couplers are stretchy and should adapt to several different hose sizes. Ironically, the store sells several different adapter kits, none of which can do this.


Questions or Inquiries?
Just want to say Hello? Sign the .