January 14, 2026
Guitar Rack Plans
January 14, 2026
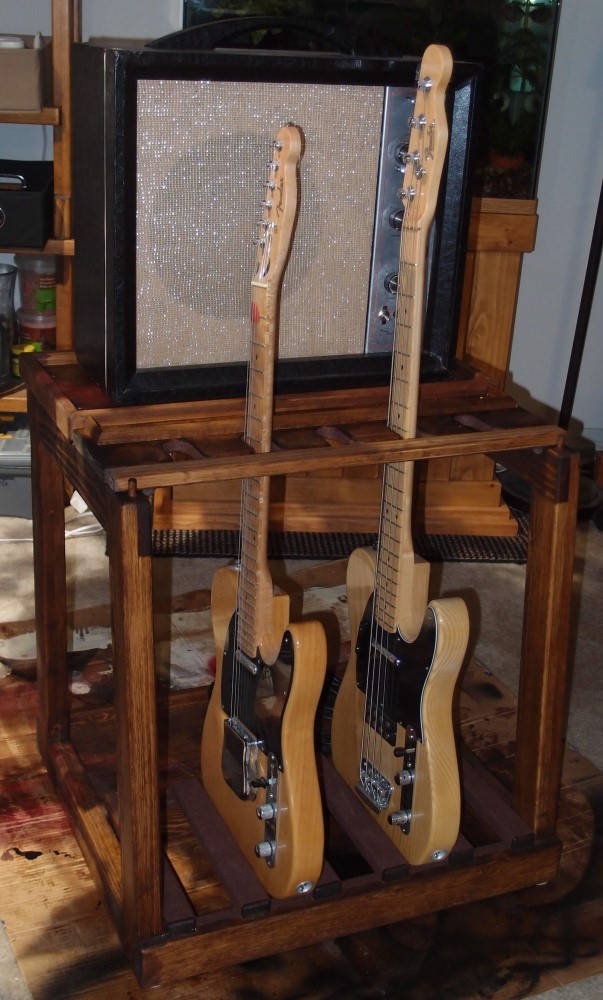
The smaller single-tier guitar racks (above) were a modification of a standard sort of stackable little bookshelf that I have built quite a few of. The larger two-tier racks (below) were based on a similar sort of construction. Unfortunately, I never saved any plans for these things, in fact I never had more than rough sketches to start with, and improvised the rest. Once I worked-out all the dimensions and details for the first one, I just copied it. These racks are now a decade old, and have stood up to humid summers and dry winters perfectly. Nothing has pulled-apart or cracked.
Your cat will love this thing
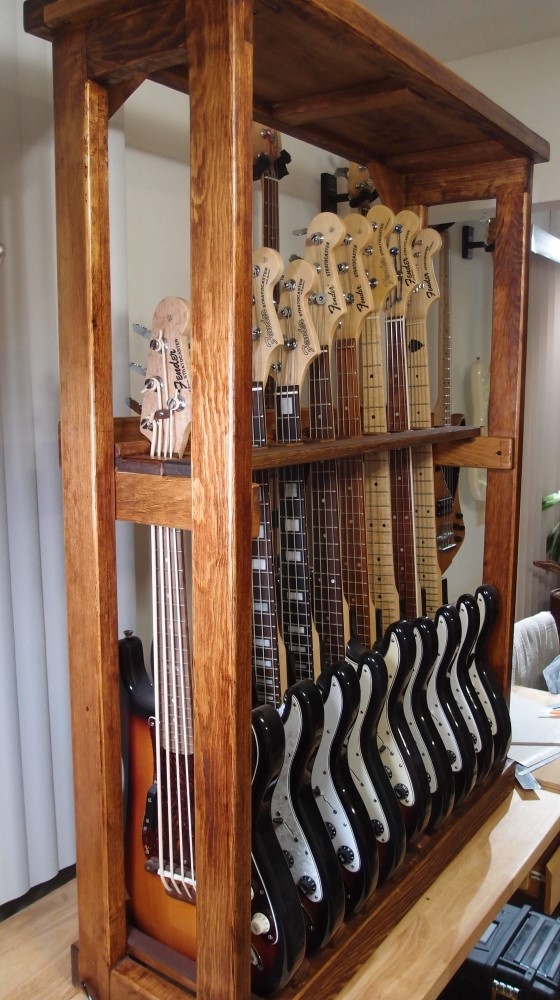
The two-tiered rack is a very nice design if I say so myself, and people have asked for plans, so I will post some details and dimensions. I am assuming you do not have a full woodshop, and are building this in your garage or kitchen, and have minimal woodworking tools and experience. I also assume you don't have a lot of tools and don't want to buy a lot of tools you may never use again and have no place to keep.
The two-tiered rack was a trickier design than the single rack. The single rack was easy - it is equal to two bookshelfs stacked, which is more than enough height for any bass. I can even put a bookshelf on top of it. I wanted the two-tired rack to fit under an eight-foot ceiling, and still hold at least some basses, so it took some fussing to get the dimensions right. Most long-scale basses will fit in the lower unit, except for some of Gibson's kookier designs. The upper unit will hold anything if it is on the floor, and most solid-body guitars in the stacked configuration, with enough clearance to avoid banging them on the ceiling.
Materials
These racks are constructed almost entirely from #2-grade 1"x3" southern yellow pine from a lumberyard near me. This wood is reasonably-priced, straight, stable, attractive, knot-free, and easy to work. If you can't find this wood, Home Depot sells a better grade of pine called "Radiata" (all the way from New Zealand!) that is very similar. The one drawback of Radiata is that the grain disappears under stain. I prefer yellow pine, but I use both.
You should know that lumber dimensions are 'nominal', 'finished' lumber is smaller. Therefore, a 1x3 is really 3/4" x 2-1/2", and a 1x2 is really 3/4" x 1-1/2". Remember that whenever I say 1x3, etc.
The big rack used about 60 feet of 1x3, which was about $.68/ft at the time. At today's prices, I would figure about $100 for all the wood. Get extra for goofs.
I strongly recommend not using the cheaper grade of pine - "white pine". This wood is extremely soft and mars easily - by the time you get the project assembled, it will be covered with dents and dings, and it will only get more with use. White pine is usually full of knots, and if you can find even a single straight piece at the store, rest assured it won't stay that way.
For the 'neck comb' I used a larger piece of #1-grade yellow pine that was much more expensive, and did a lot of ins-and-outs with the jigsaw. I don't think you need this, I think there is a much better way to make this part, described below. The only other dimension of wood is the body separators at the bottom, which are the same #2 yellow pine, but 1x2".
Yellow pine and Radiata are hard enough that you must pre-drill all screw holes to avoid splitting the wood. In general, treat them as though you were working with hardwood, not mushy pine. You might also want to invest in an inexpensive countersink.
Why not just use 2x3 lumber instead? The lap joints in my design are incredibly strong, as strong as the wood itself. While you could cut-in similar flush lap joints with 2x3s, it would be a lot more difficult. Also, the two-part glued construction is a lot more resistant to warping than a single piece of wood. Finally, I don't think the better grade of wood is available in 2" thickness, and I would not use soft white pine framing lumber for furniture.
You will also need:
- Screws. I used cheap black drywall screws. In the few places where the heads are exposed, they look good. You'll need short and long screws.
- 1/4" hardwood dowel
- Wood stain and some sort of finish. I used Danish oil.
- A few sheets of self-adhesive felt padding from Hobby Lobby.
Tools
At a bare minimum, you will need a hand saw, a drill, a tape measure, and a square. You can probably get away with a just hand saw, as nothing you need to cut is bigger than 1x3, but miter saw will make much more precise cuts faster.
This whole project is really built around a belt sander and several #80 belts, as well as a few sheets of #80 sandpaper. While you could conceivably hand-sand the whole project, that would be a huge amount of work and take much longer. If you don't have a belt sander and can't borrow one, a little Ryobi would be good enough and a good investment. I've also had good experiences with Ridgid tools.
If your dad is a boomer, he probably has a belt sander you can borrow. In fact, you can probably get him to build the whole thing for you.
A router would also be useful. And finally, you need a big-enough place to work, with a large flat surface like a countertop or floor. Find a big cardboard box behind a store. You can cut off a flap to use as a square, and flatten the rest of the box for a work surface and then throw it away. For the really dusty messy work, take it all outside.
A sharp eye might also notice where I used my finish nailer to tack things. You don't need one, but if you have one, it can be useful. The nail heads fill up with stain and more or less disappear. If you have power tools, go ahead and use them!
Some Notes on Gluing
Most any decent wood glue will do, you don't need the most expensive. You will need quite a bit of glue for this project, so get a 16-oz bottle. I use Titebond original unless I have something else I got for free. Don't use Elmer's school glue, it is formulated to wash out of clothes, and comes apart when wet.
Roughen both surfaces a bit with #80 sandpaper, then spread a thin layer of glue completely over both areas using an old credit card, a small brush, or your fingers. Coverage is more important than volume. Press the two pieces together and slide them around a bit, then clamp them firmly but not too tight. You want to see glue squeeze out all around the joint, wipe that off with a damp rag.
If there is a lot of squeeze-out, I scrape it off and put it in a jar for re-use, but always make sure you get all the squeeze-out off. Any place you leave glue on the surface of the wood will show up later when you stain it. You don't want to clamp so tightly that you squeeze out all the glue, or worse, leave clamp marks in the wood.
In some of the photos you can see where I didn't get quite all the glue off.
Some Notes on Sanding
Always sand with the grain, never across it, especially when using coarse sandpaper. If you make scratches across the grain, they will pop out when you stain, and you may never get them out. Even worse, don't use an orbital sander for woodwork - it will cover the piece with little circular scratches. That little palm sander you might have - don't use it. Use a belt sander.
When using a belt sander, always keep the tool flat and moving and take care not to let the rollers dig in. Any place you park the sander will make a gouge. Get a feel for the tool - it has a mind of its own. Always have the belt moving before you touch it down, and don't stop it until you have pulled away. Let the tool do the work - you don't have to press. Always wear a sanding mask and safety glasses.
When hand-sanding, wrap a 1/4 sheet of sandpaper around a block of scrap wood to get a nice flat result. Only the smallest touch-ups should be sanded without a block. Finger-sanding tends to make uneven surfaces even more uneven.
Framing - Part I
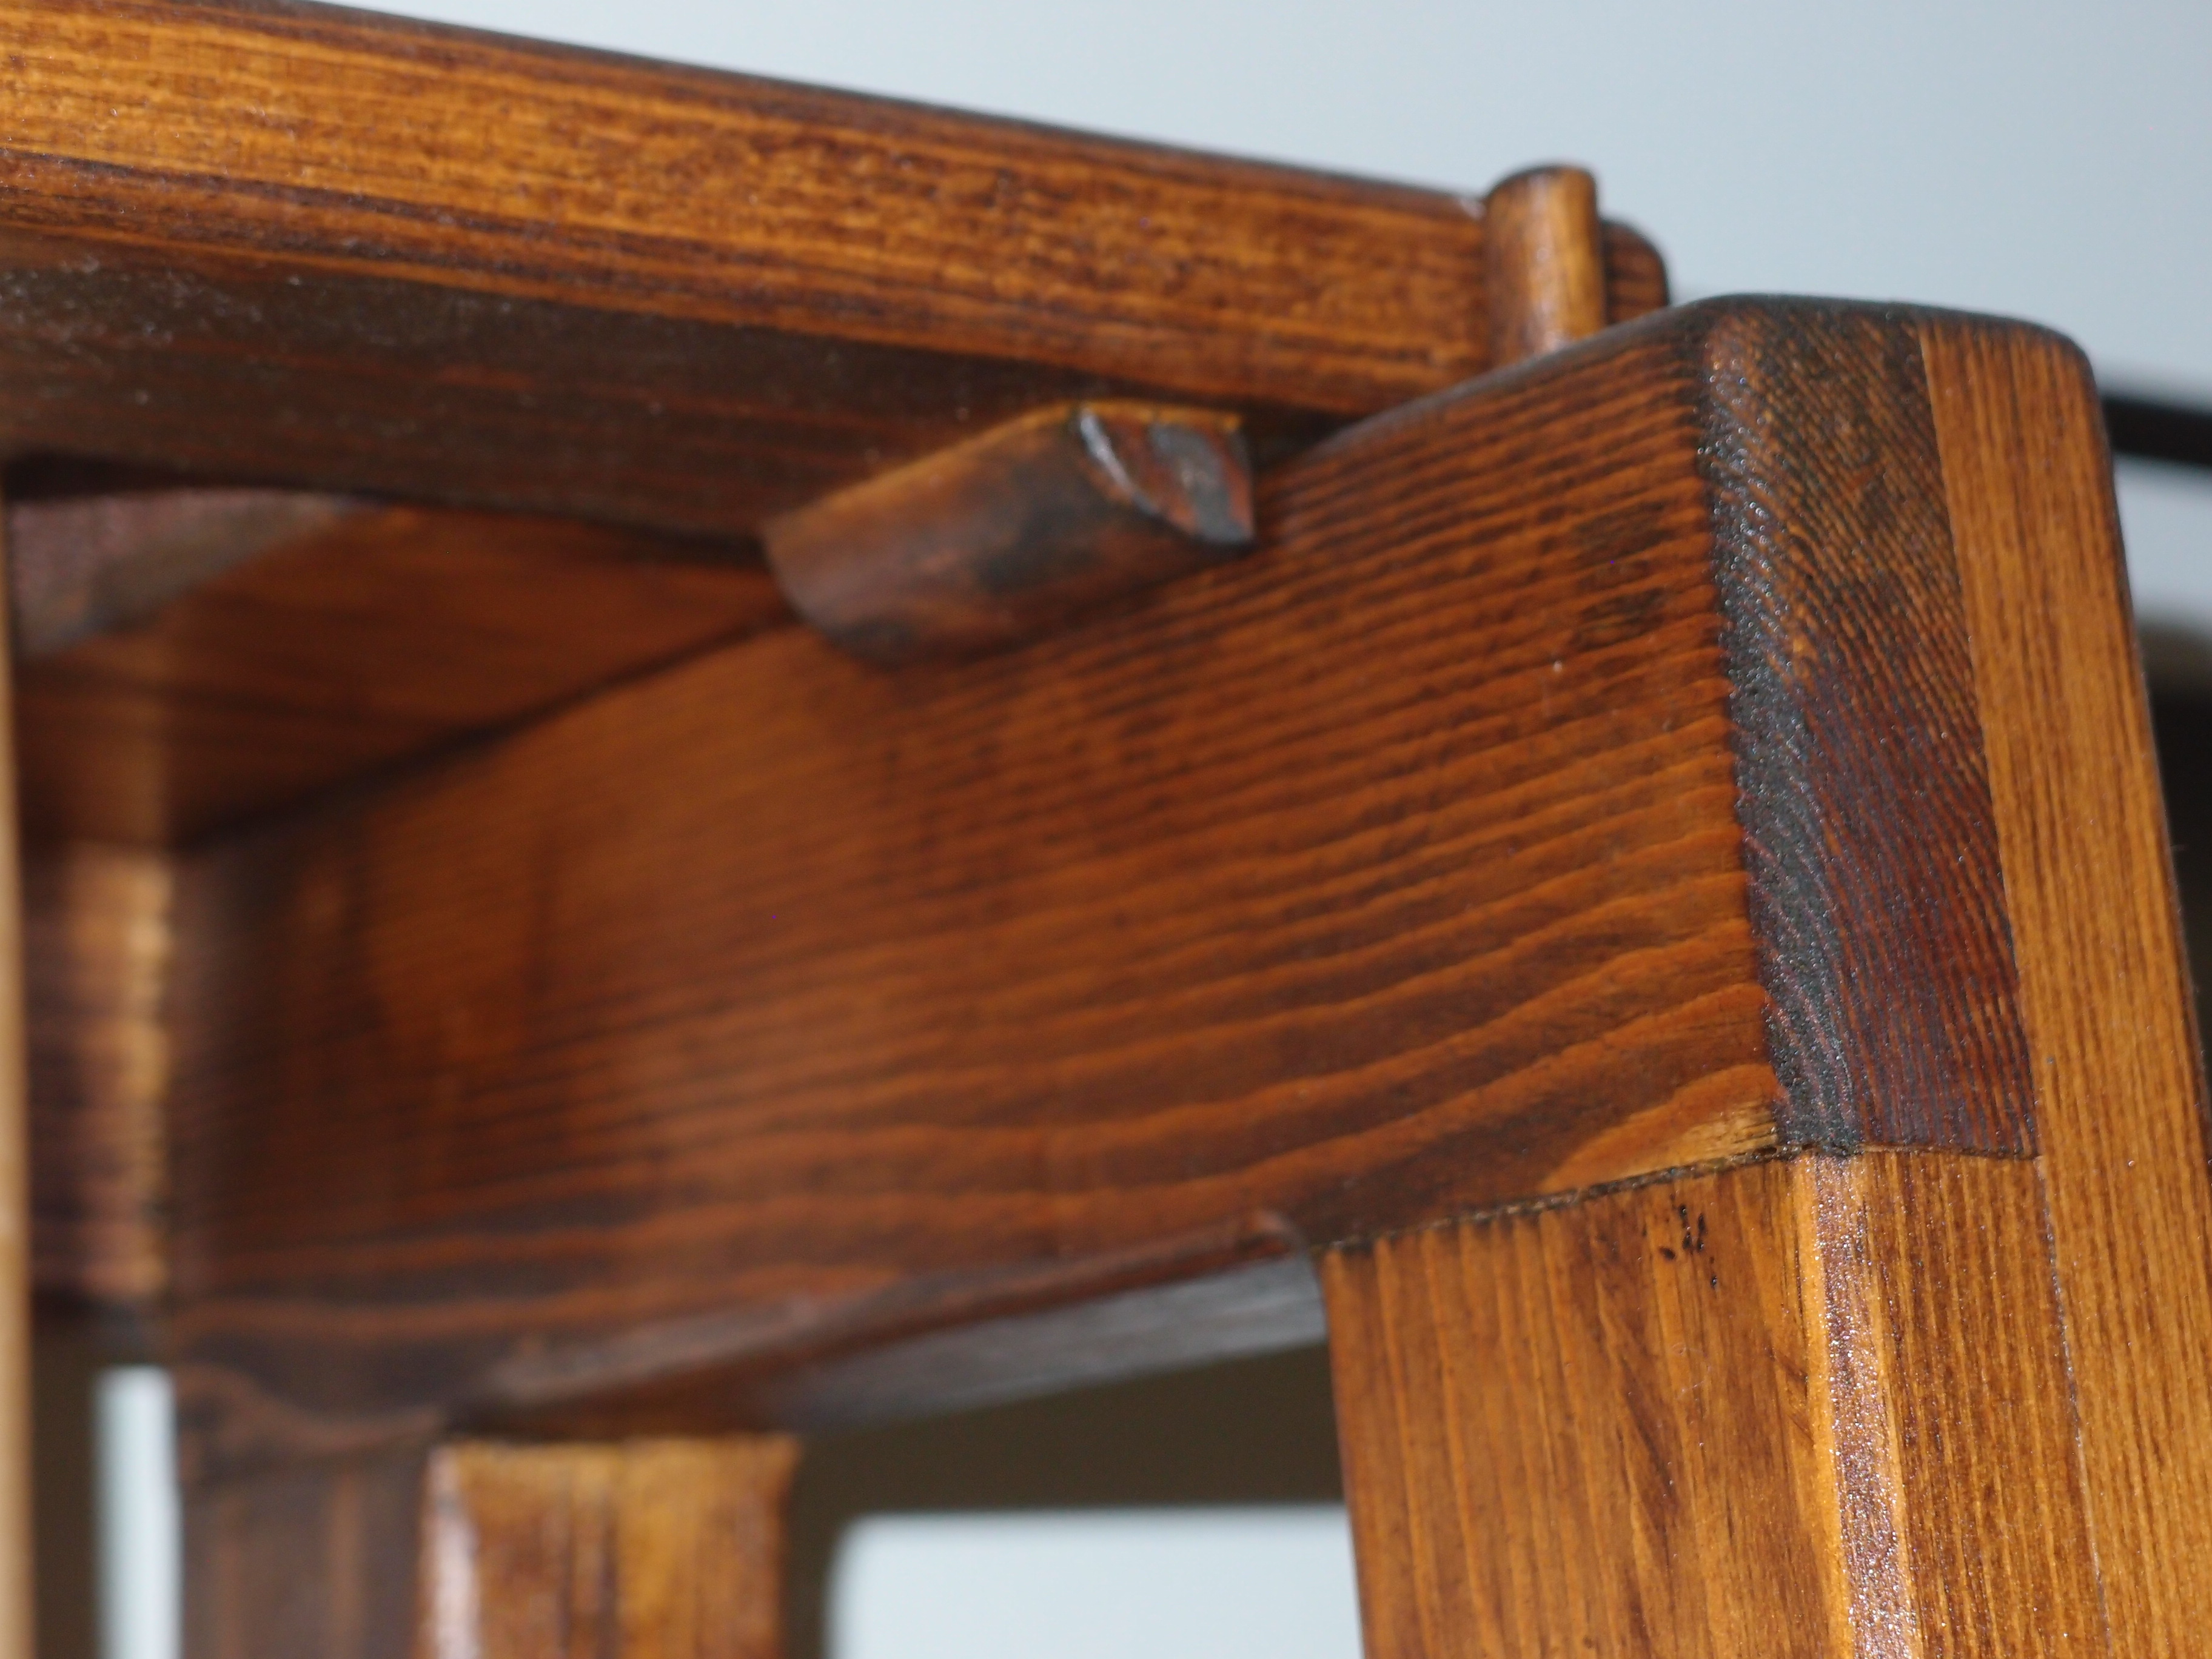
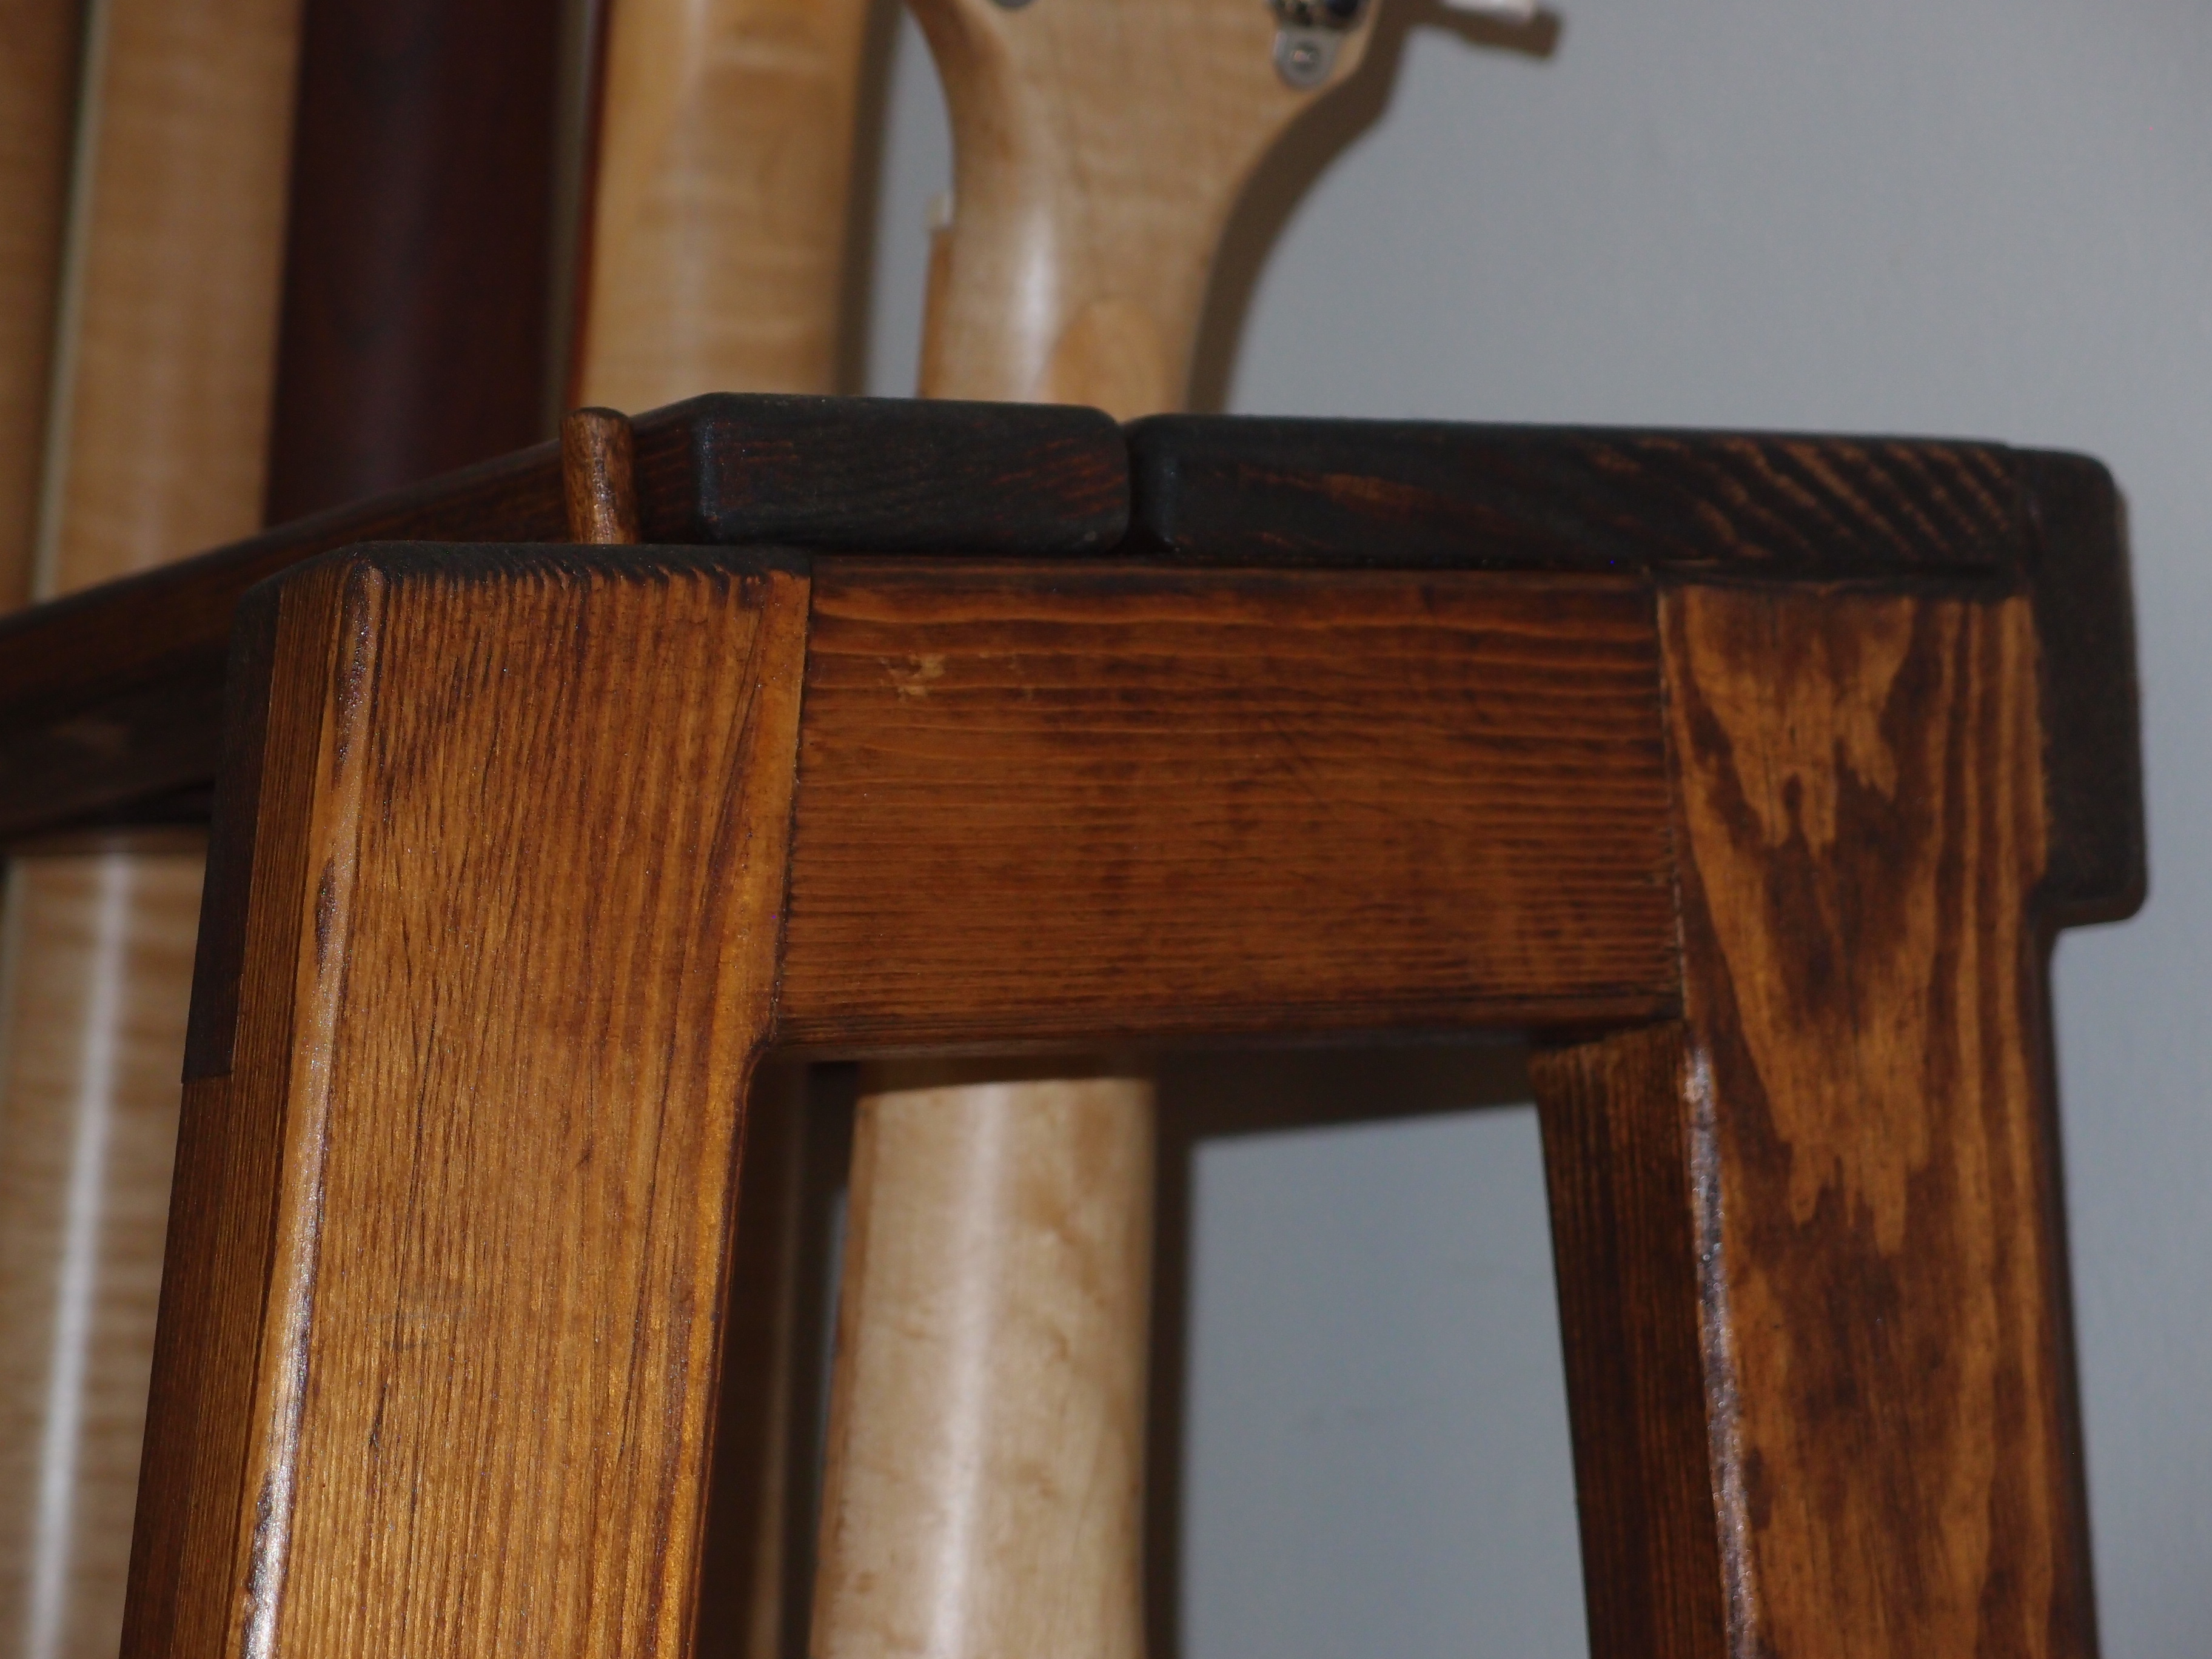
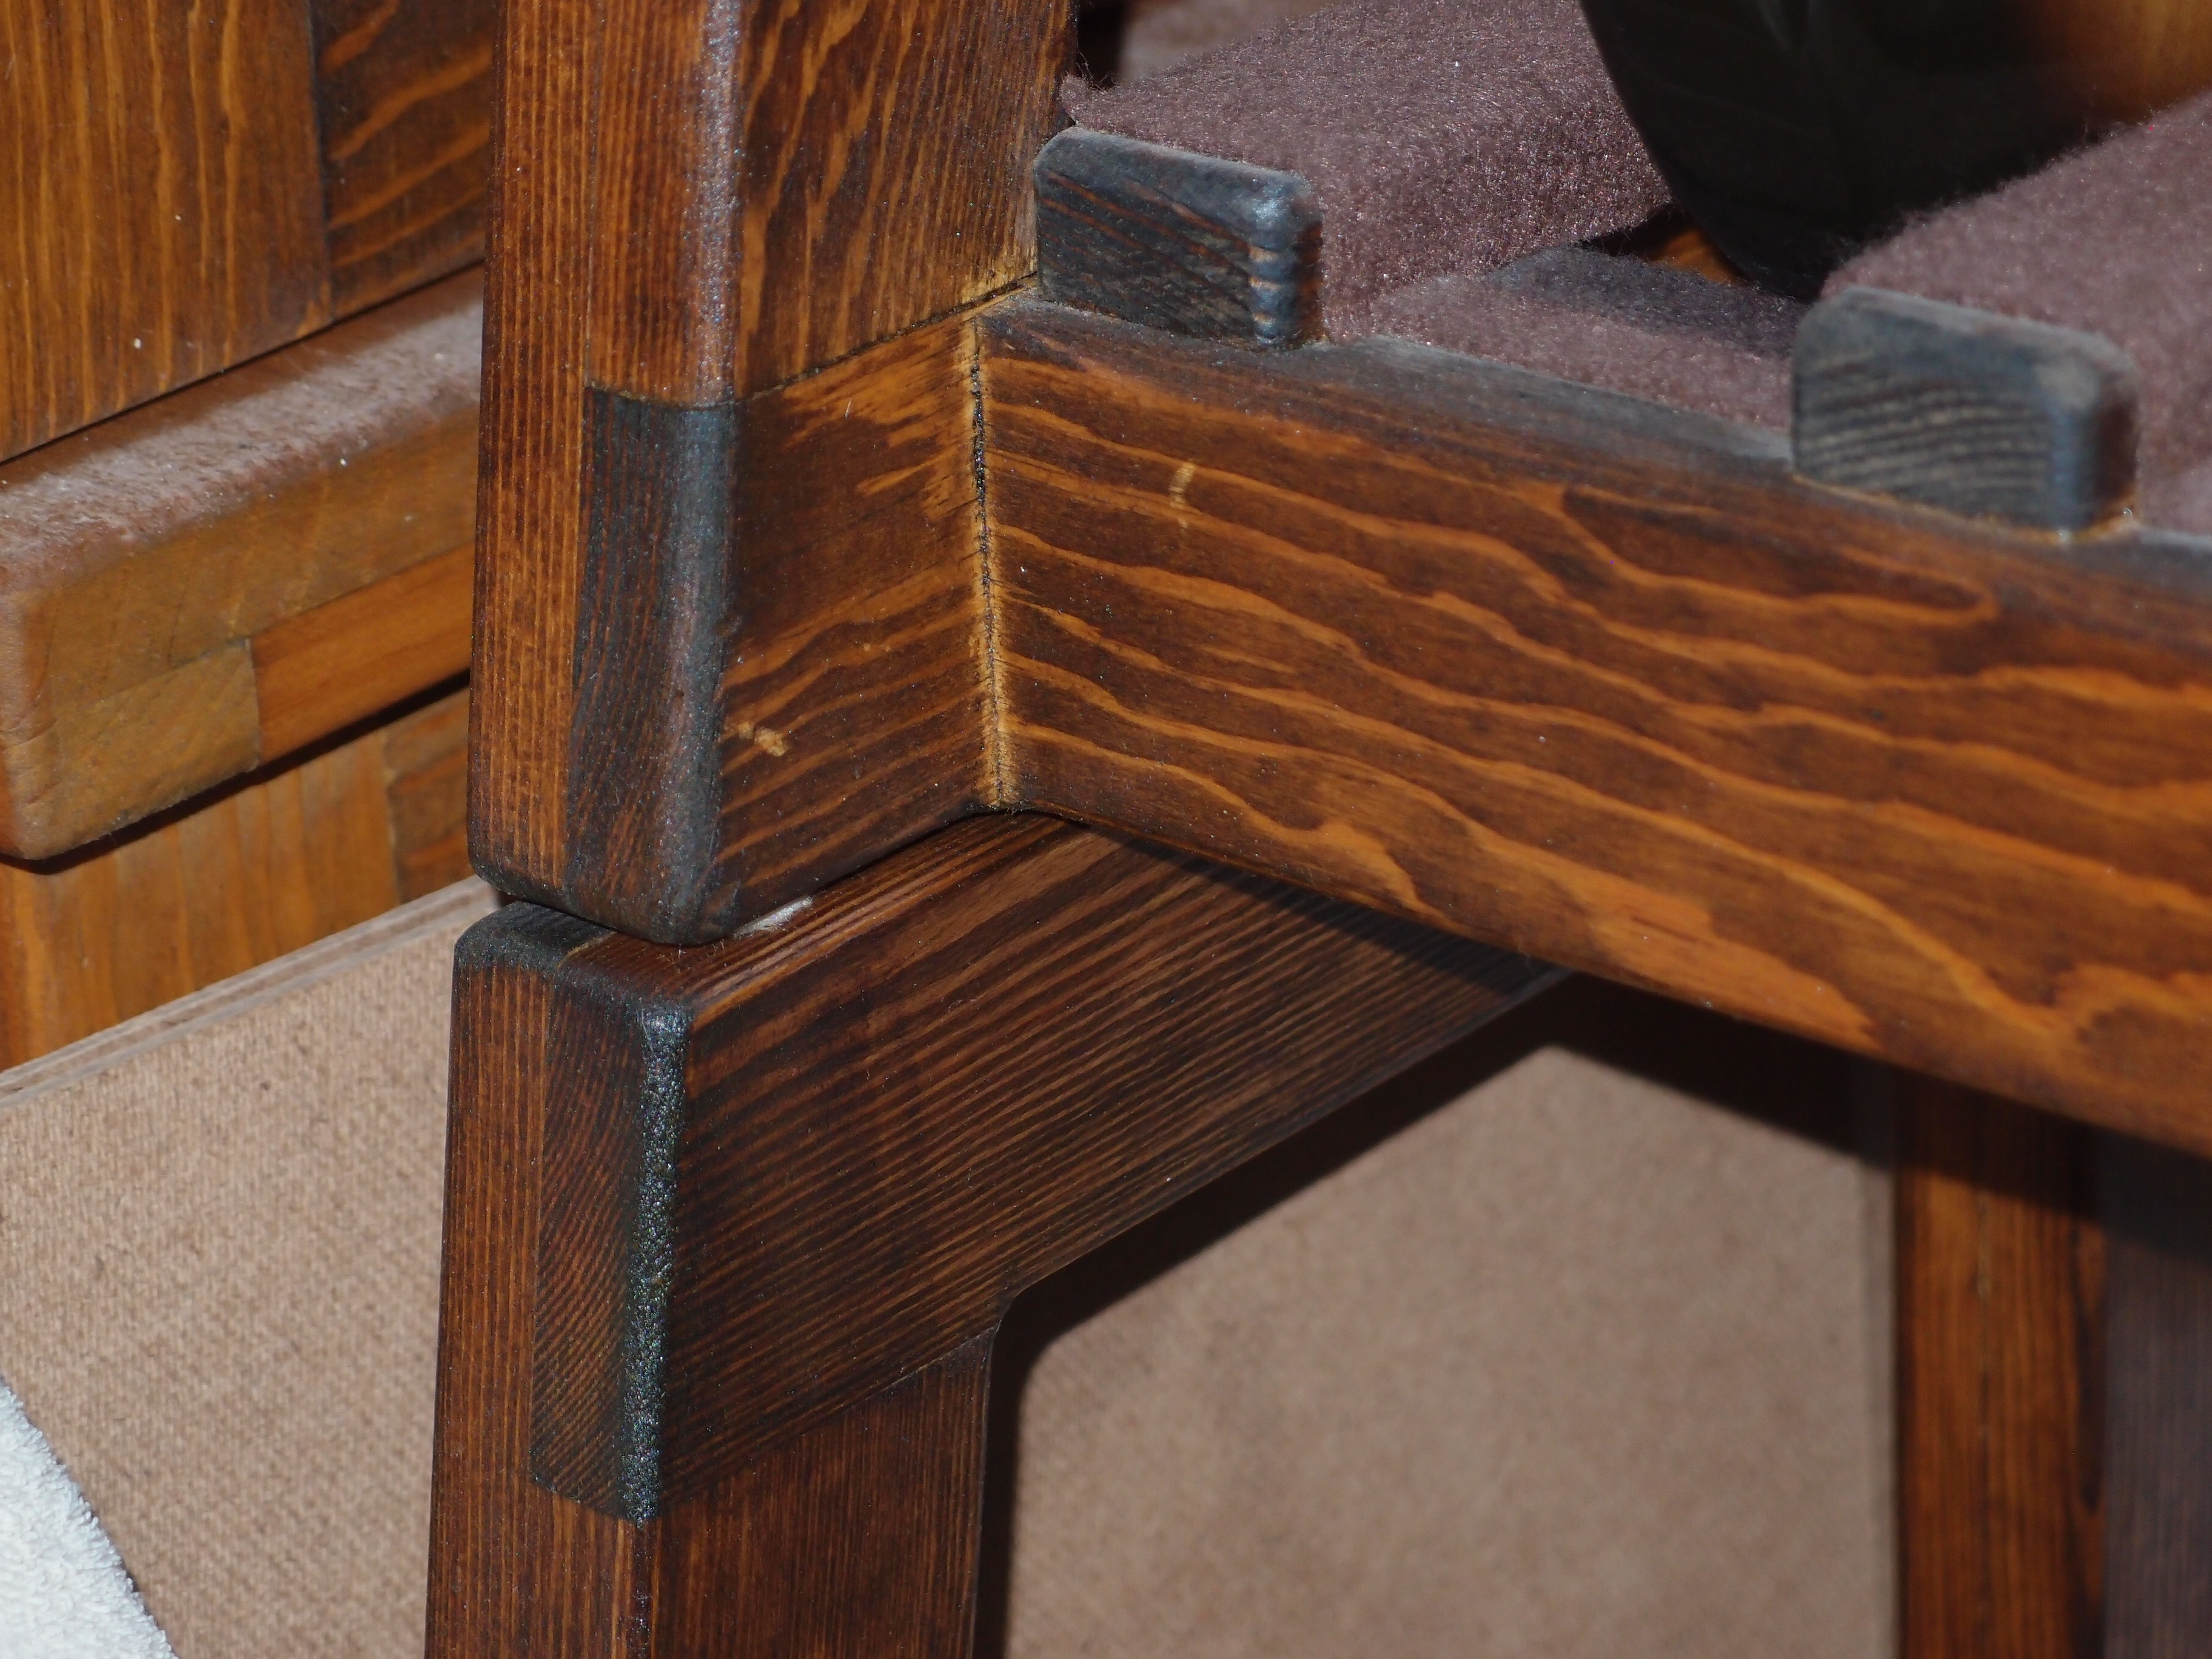
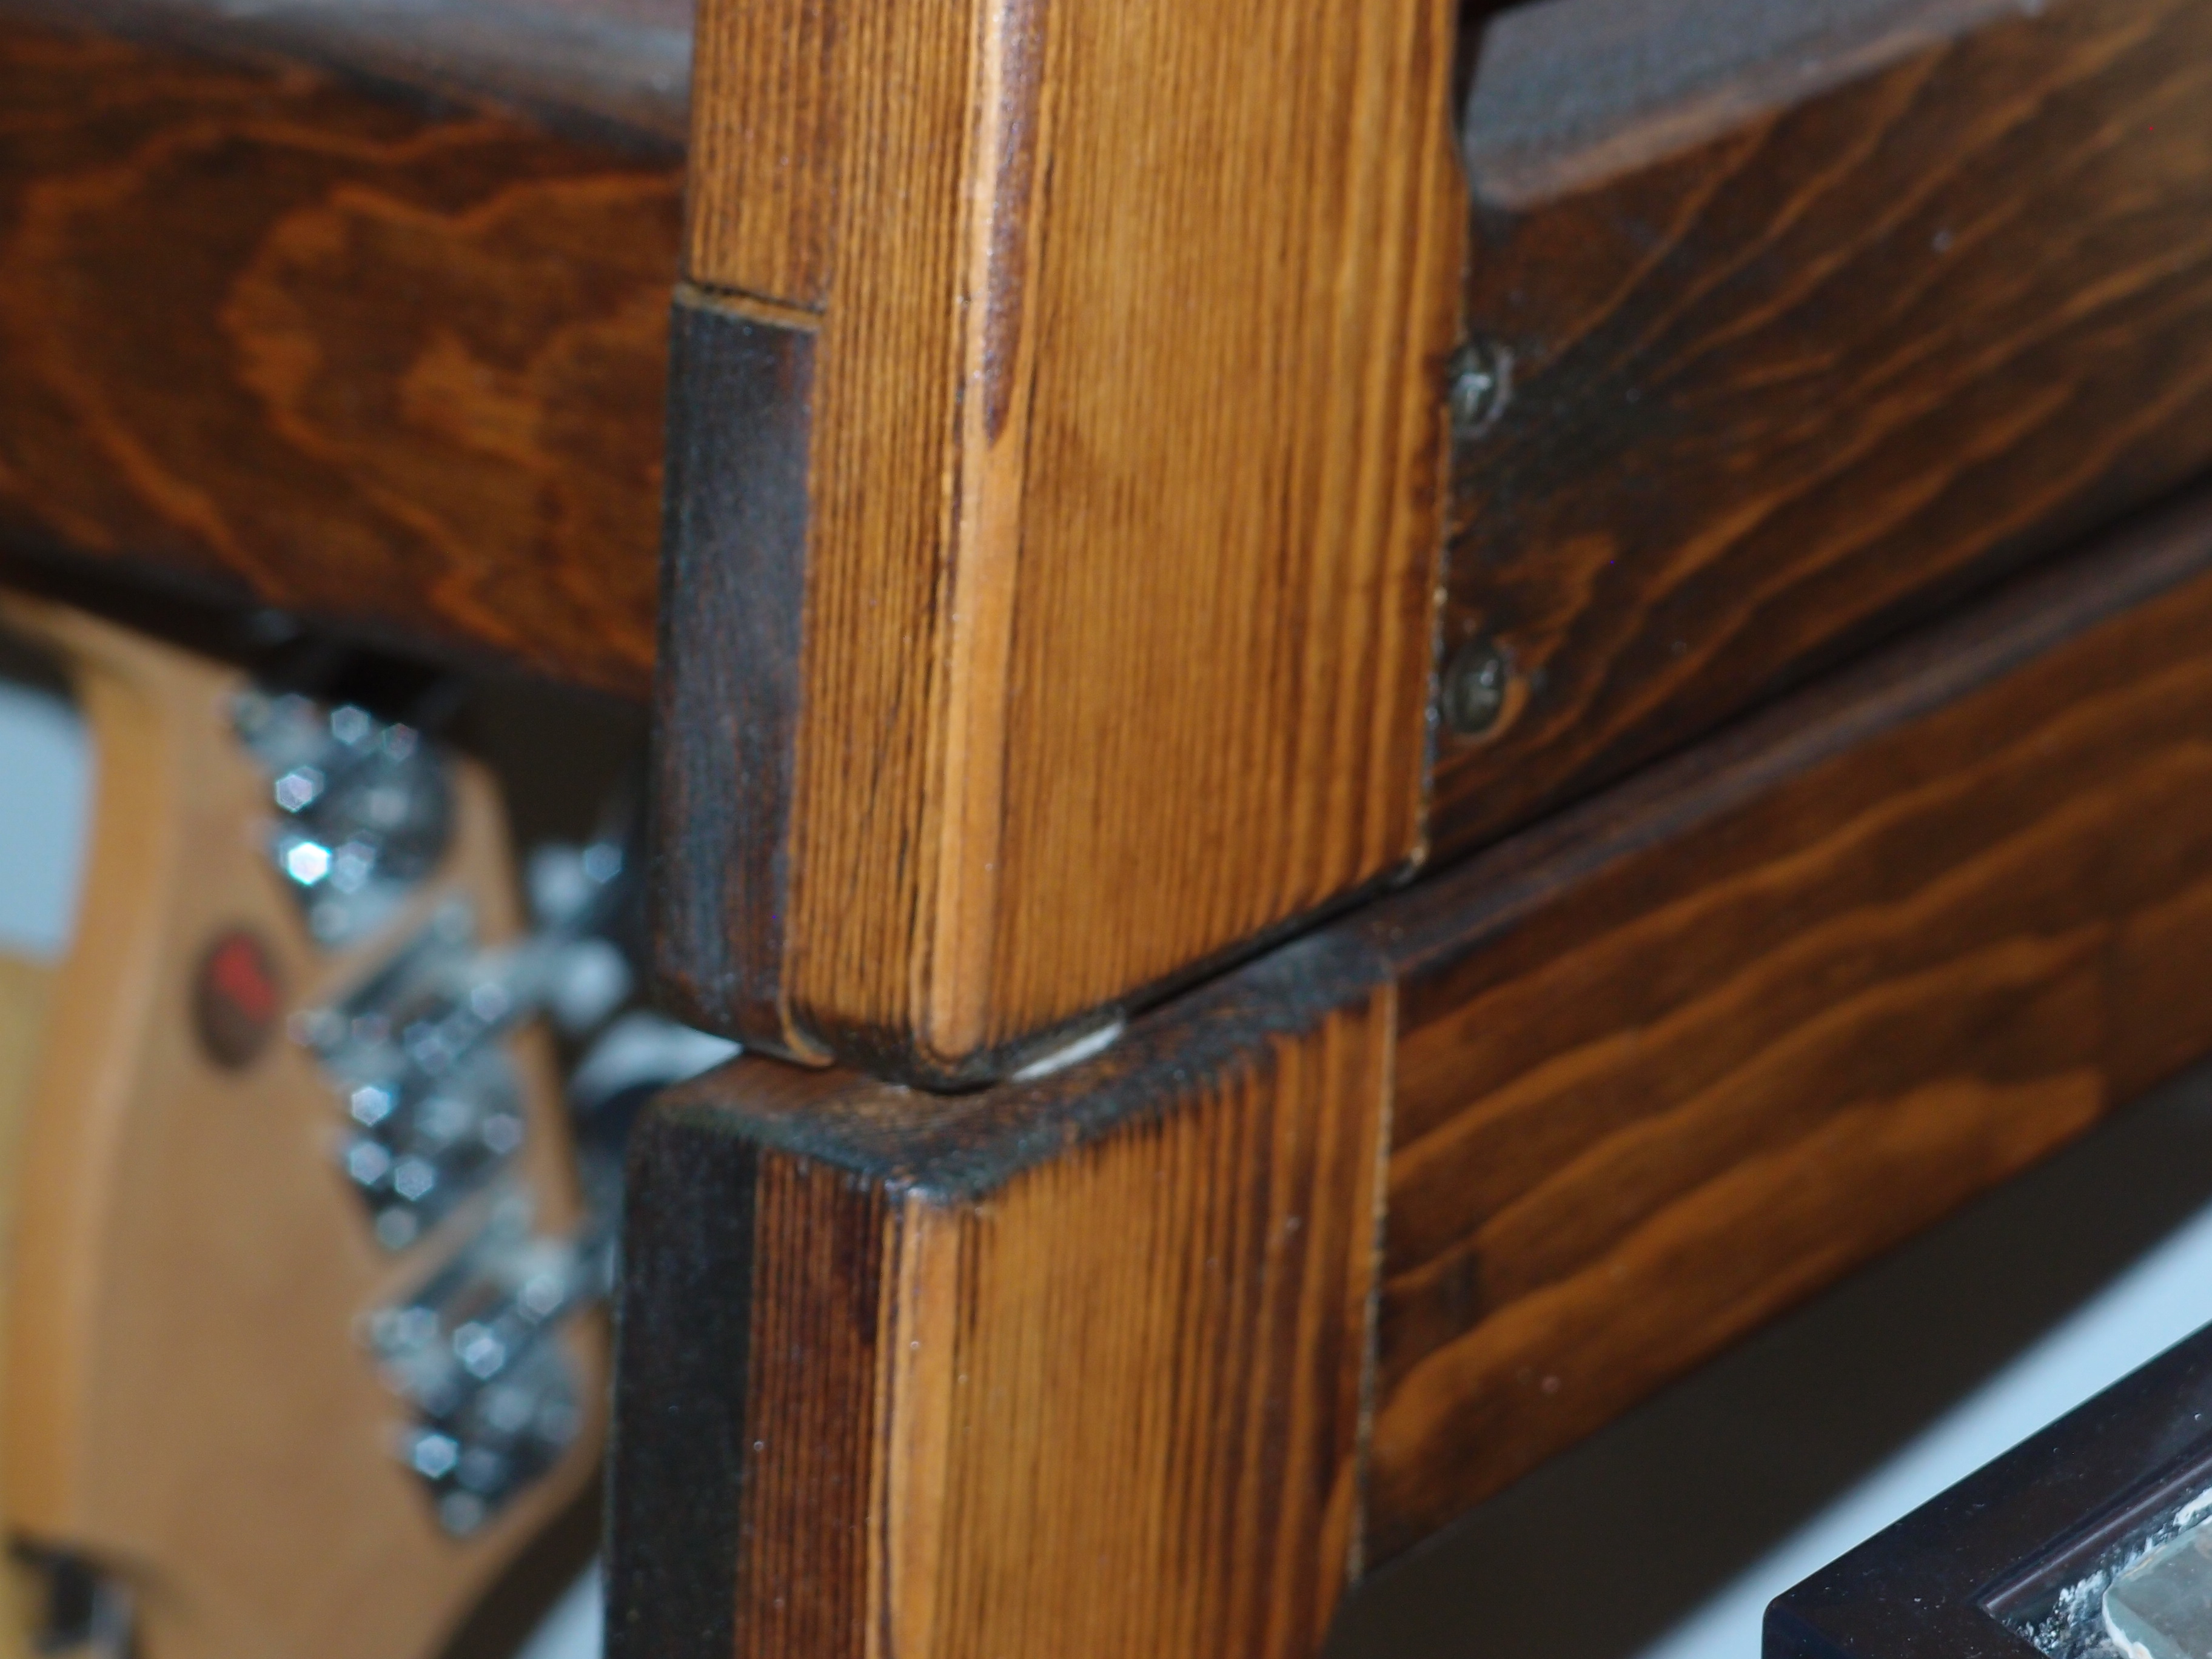
The main frame joints are all glued lap joints. Below are some detail photos. The camera flash makes everything look ugly, under normal lighting these are actually quite nice pieces that your wife would probably still want in the basement. Also, these racks are around ten years old now and have been knocked-around a bit and haven't been cleaned in a while.

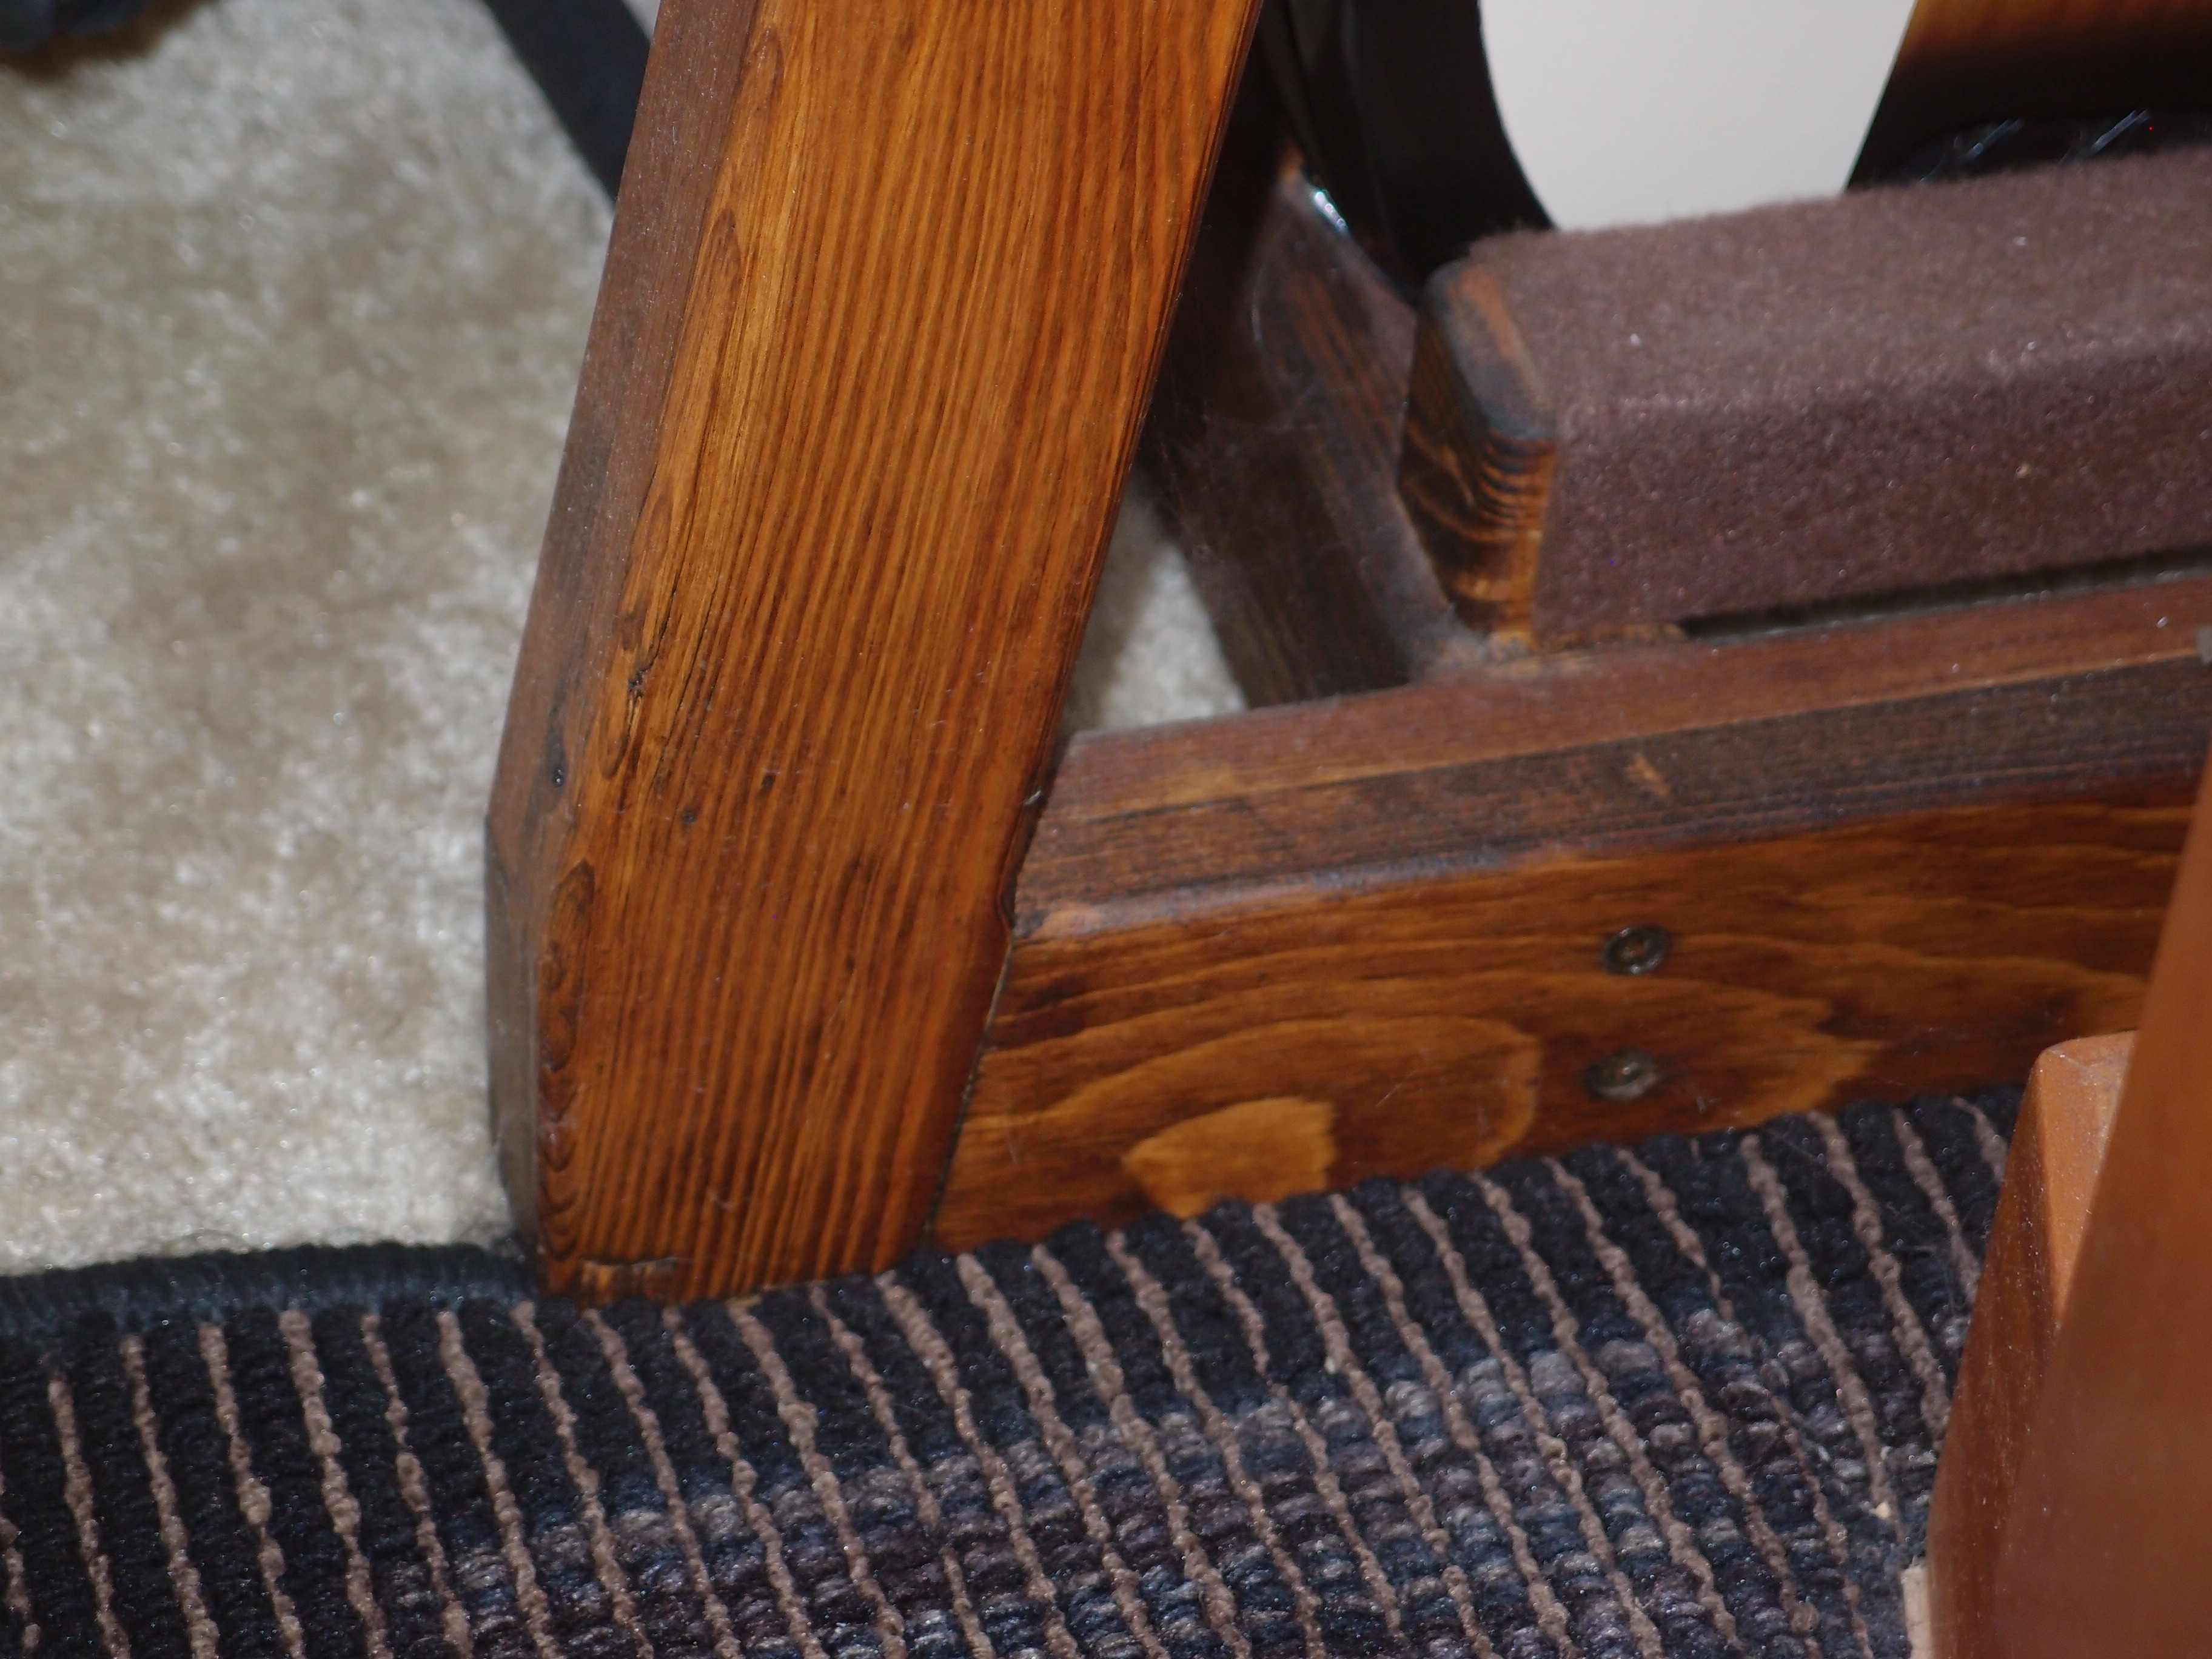
The outer frames of the racks are each assembled by first cutting cutting four pieces to the approximate length. Then glue the joints and adjust to make the precise dimensions, with a bit of extra sticking out that is removed later. When everything is just right, clamp and let dry.
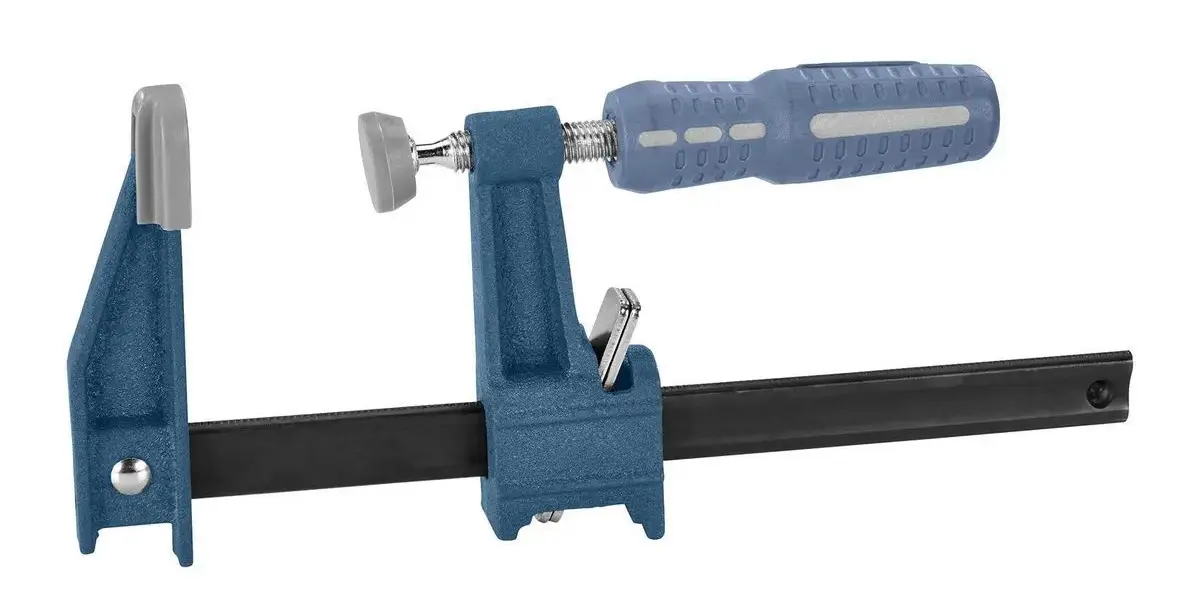
I made the sides trapezoidal, but you could make your life simpler and make them rectangular using the bottom dimension for stability. You'll need a minimum of 4 small clamps for this part. Clamps like this are cheap at Harbor Freight, you can't have too many!
A Note on Harbor Freight
These little clamps are great, I have a bucket full of them. Their longer clamps are kind of weak compared to others. Their pull-saw is a good buy, but anything else that is supposed to be sharp probably won't be. Their drill bits are awful, and the power tools are very hit and miss, I would stay away. A belt sander would probably burn-out after one use. Name-brand stuff like glue is exactly the same as anywhere else.
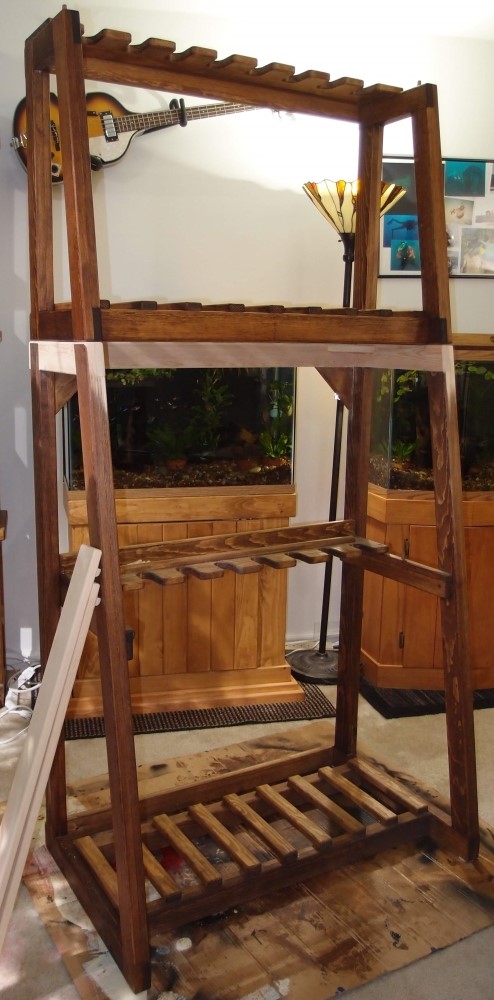
The side frames are built as single pieces and cut into top and bottom later. Build one first and let it dry, then build the second one on top of it, but mirrored. That way they will match perfectly. For these large pieces, you want a large square to make an accurate right angle. There are lots of things you can use as a large square. For example, a wall and floor are hopefully square. Cardboard is often cut with surprising precision.
Next, install the middle braces which will become the top of the bottom rack and the bottom of the top rack. Install them with about a 1/8" gap, or enough to fit your handsaw between with a bit of wiggle room. When all the joints are solid, separate the top and bottom units by carefully cutting with a hand saw. I recommend a thin pull saw rather than a thick push saw. Again, cheap at Harbor Freight.
Now you have two sets of perfectly-matched side frames. Even the grain lines up, as you can see in the photos above. I came upon this method by accident, when I found the first rack I built was too big to move around, so I split it and rebuilt the ends. The second rack I built was done this way on purpose, because it works so well. Once you have the top and bottom units split, you can decide to do one and leave the other for someday, and still end up with a matched set.
Cut pieces to fit in all the gaps and make the whole structure double-thickness. If you are using a hand saw, cut them a bit long and use the belt sander to make them fit perfectly. You can use a miter saw as a nibbler. Glue them in the same way as the joints, and put a clamp at least every 12 inches. This is why I said you can't have too many clamps.
Don't worry if the pieces are not exactly the same width, that will get cleaned-up later. The right way is to make the inside edges flush, so any unevenness is on the outside where it is easy to deal with. The lazy way is to make the outside edges flush and just forget about the insides. Without a belt sander, the lazy way is the only way.
Take your belt sander and carefully sand down any ends that you left sticking out. Then sand all the uneven joined edges smooth, but leave all the corners sharp for now. Finally, give the entire piece a nice even #80 scratch finish. I've used this finish for a lot of things - it is easy, tough, and easy to repair, unlike say, a glossy piano finish.
The sander won't reach inside the frames, you'll have to do a lot of that by hand. A lot of these places may never be seen, so you don't have to do a great job on them; concentrate on what shows.
Framing - Part II
That was the complicated part, the rest is easy, really easy if you have a miter saw.
First, you'll need to make the rear cross-bars. These are a double-thickness of 2x3, with the ends formed into lap joints that fit the back of the upright frames. So one piece is about 3" longer than the other, the shorter piece centered on the longer one. You'll need four of these to frame-up the back of each top and bottom unit.
Then you'll need the front cross-bars. These are double-thickness of 2x3, with butt ends to match the inner length of the rear cross-bars. These also serve as the lower supports for the guitars. You'll need three of these, two for the bottom unit and one for the top. Finish all the cross-bars the same as the side frames - #80 scratches
The cross-bar joints are glued and screwed. The rear cross-bars joints are fixed with two short (1-1/2") screws from the back, and one long (3-1/2") screw between them from the side. The screws take the place of clamps, you would need some very long clamps. When installing the screws, make sure the joint is straight and square and snug, with no gaps. A wood screw will not close-up a gap, no matter how much you crank down on it. As I said earlier, you should pre-drill the screw holes, about 1/8" is good. The pine is soft enough that you can carefully set the screws flush without countersinking these holes.
The front cross-bars are screwed and glued the same way, with two long screws per joint from the side. Before the glue sets, make sure everything is nice and square, and use a little muscle if it isn't, this is your last chance. Gluing end-grain is pretty weak, and the area is small, so I assume the screws are most of the strength of these joints. Let everything set-up overnight.
To keep the top rack from coming off the bottom in an earthquake or similar dog- or child-related event, install four 1/4" dowels in the top of the bottom rack, and drill matching 1/2" holes in the bottom of the top rack. As I recall, the dowels stick out about 3/4". I also installed some extra triangular bracing at the upper back corners of the lower rack to strengthen it against side-to-side swaying, you can see them in photo #2. There is no sway bracing in the bottom corners because it would get in the way.
Now it is time to round-off all those sharp edges. I ran a router with a 1/4" roundover bit anywhere it would reach. With a deft touch you could use the belt sander for the same effect, or even do it by hand. There will be many places you can't reach with a machine that will have to be done by hand. Block-sand any smooth spots to nice #80 scratches, but be careful not to hit the black screw heads.
( an earlier design )
The final part of the main frames is the body separators. These are just pieces of 1x2, finished as above and glued in place. Only the upper edges are rounded-over. The spacing is 2-1/2", so you can conveniently use scraps for spacers.
Each body separator has a 1/2" belly cut into the right side for extra hardware clearance. You don't need this if you don't have the tools to do it. This is one place where the roller of the belt sander is actually useful - you can use it to make the bellies. Sketch one out, remove the material with the belt sander, then use the first one as a template for the rest. You also don't need bellies in all the separators, just a few will probably do. A jigsaw would make this job much faster.
You don't have to use strictly 2-1/2" spacing, you can make custom spacing for whatever is in your collection. I made some of the body separators double-height so I can put one acoustic in the place of 2 electrics. The bar in-between has a trench for the strap button. Or just leave one bar out for a double-width-plus slot.
Finishing
I glued the body separators down, but if I was doing it again, I would screw them. Make them longer than shown, and drill-out the holes to 3/16", to avoid cracking the wood near the ends. I would also countersink the holes to minimize the stress on the wood that close to an end. This is not only faster and easier, but allows you to make adjustments.
Any place that touches a guitar is covered in self-adhesive felt. If you screw the body separators, cover the cross-bar entirely with felt, and screw the body separators down over it. Otherwise, do the body separators first, then use scrap bits to do the in-betweens. Also put some felt feet on the bottom of the top rack to keep the two racks from sticking together. This felt is pretty much permanent and does not come off easily.
The main frames are now just about done, and ready for finishing. Take a final look over everything and scratch-up any places that still need scratching. Then you can stain it. The scratched surface will drink up stain, and the result will be a lot darker than the can indicates, so you might want to do some testing on scratched-up scrap first. Pre-stain is also useful - it plugs-up the wood a little and makes the stain go on lighter.
Yellow pine takes stain well, but Radiata does not - it loses all grain. "Natural" stain has always been my secret weapon, no pigment, but it makes the grain pop, even Radiata. You can also use it as a pre-stain for a color coat. Wood stain smells terrible until it fully dries, so plan to store the piece somewhere not in the house for a while.
Finally, I finished mine with several generous coats of Danish oil. The oil soaks in and hardens the wood. As long as the previous coat is not fully dry, a new coat will soak in. Once you let a coat completely dry, it will seal the wood and subsequent coats will build on top. Note that this is not what the can says!
The result is a very damage-resistant finish that is easy to repair if need be. You could also use wipe-on polyurethane, but I don't like water-based junk. Danish oil smells almost as bad as stain, and can take a while to dry, depending on the temperature. It might be a week or two before you can bring it inside. Summer temperatures help. From time to time you can refresh the finish with a new very thin coat of oil.
Always let oily rags dry out completely in open air before throwing away - don't want to burn the house down!
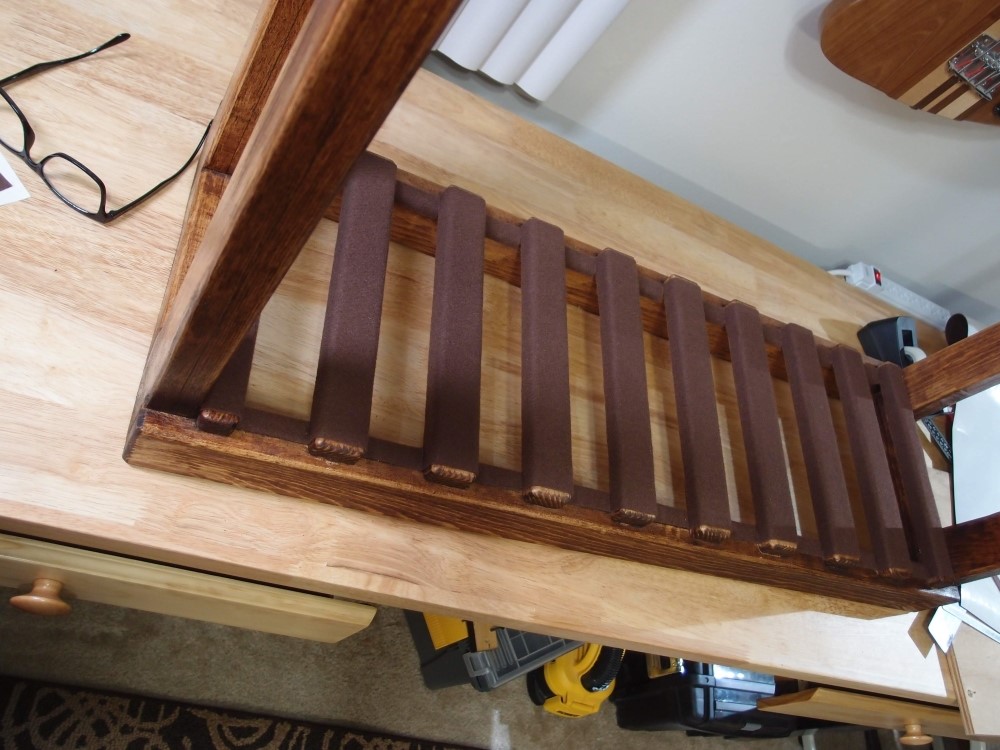
Framing - Part III
The one part of the project left is maybe the most interesting part - what I call the "comb" that separates the guitar necks. Above, you can see my original design, which is made from a single piece of #1-grade yellow pine, with a lot of fussy woodwork to make the slots. This is not how I would build it again.
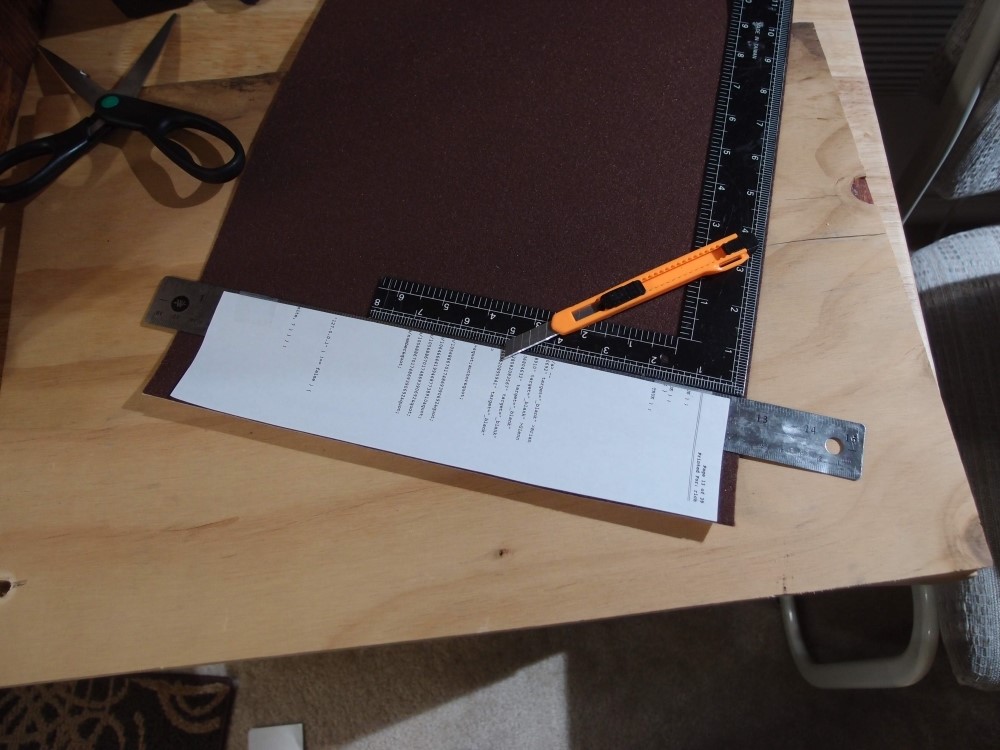
The 'teeth' are 2-1/2" wide, while the slots are 1-1/2" wide, the opposite of the body separators. A far easier and cheaper way to make the comb would be to glue short pieces of 1x3 across a long piece of 1x3, using scraps of 1x2 as temporary spacers. You'll end up with square slots instead of rounded ones, which makes no difference. Since I didn't actually do mine this way, that's all I can say, you'll have to work out the details yourself. Since you already have the main frames built, you can use them to size up the parts for the combs. Make sure you round-over all the edges that might come in contact with your prized axe, and cover them with felt.
You'll need quite a few short pieces for this part. Save all your previous goofs - long goofs can be re-purposed as short goofs pieces, and short goofs can be used as spacers.
The comb of the top unit is simply screwed to the top of the frame, no glue. Four screws are more than strong enough, and that allows for removal and adjustment. Remember what I said about using screws near the end of a piece of wood - be gentle.
For the comb of the lower unit, attach cross-bars to the inside of the main frame with screws, and then attach the comb to the cross bars. When the combs are in place, make some retaining bars from whatever you have leftover. Glue some small bits to the bottom to prevent sliding. Finally, install dowels to keep the retaining bars in place. You could also hide the dowels inside the retaining bar. Why didn't I think of that before?
Finish all parts as before prior to final assembly.
There are a lot of details that you could do differently, but I think this is the fastest, cheapest, and easiest way to build a rack like this. This was before the advent of pocket-screws. If you have one of those gadgets, there are a few places you could use it.