Electronics & Wiring
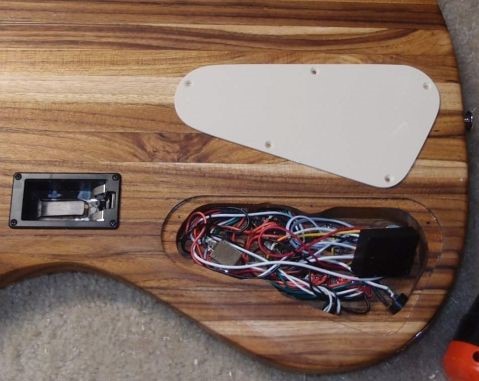
One of the fun things about building electric guitars is wiring them up. Factory wiring tends to be simple, minimizing the amount of fussy handwork required. Many manufacturers keep strictly to 'classic' designs, seldom if ever changing anything. These designs are generally simplistic, often crude or even stupid, and sometimes outright flawed. There is no need for you to do this. I don't. Here are some of the things I have done over the years. I don't claim to have invented any of this, although some of these schematics I have never seen anywhere else, and had to derive them myself.
These are my pencil drawings from over the years. Many of them are not just circuit diagrams, but actual physical representations of the wiring that you can much more easily work from. Most are drawn from actual working hardware. Many of them may look quite simple, but are actually totally un-intuitive and not at all easy to derive ( or I am a bonehead. )
You can get anything on eBay, delivered to your door amazingly cheap, often just pennies per part. That is what drove Radio Shack out of business. Overseas orders can take several weeks though.
Electronics Test Stand
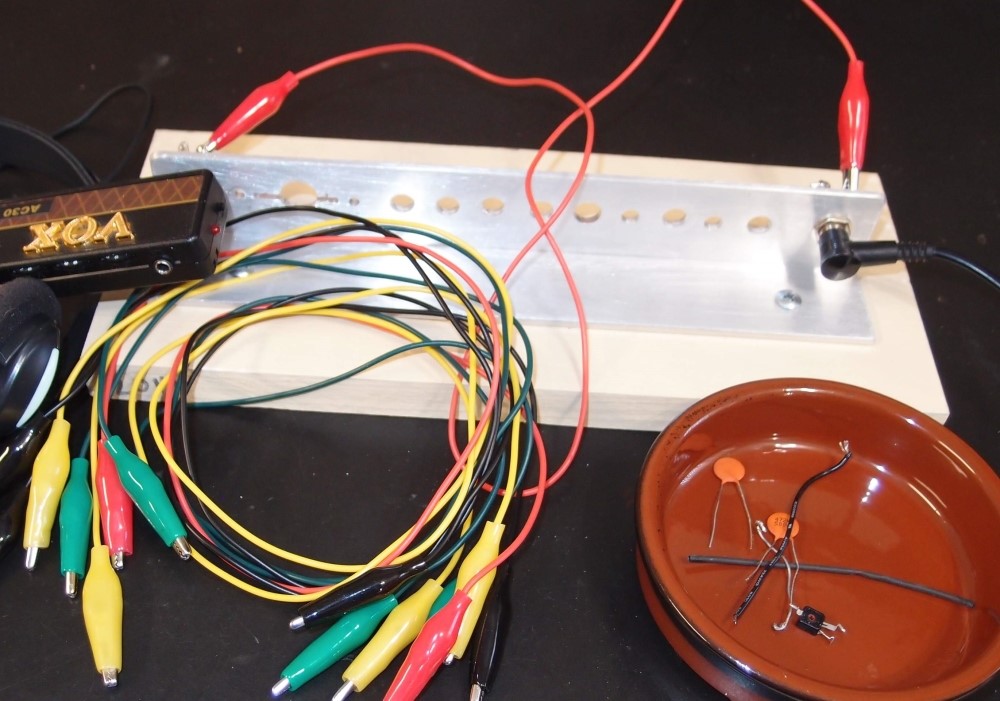
This is a little test stand I built, along with some alligator clip jumpers from Radio Shack (R.I.P.) It is a piece of aluminum angle attached to a piece of wood for stability. Different sized holes will take pots, switches, and jacks, including even a blade switch. A 1/4" jack is installed permanently at each end. The aluminum angle automatically grounds everything.
In the picture, the input is at the right and the output is at the left, but this is entirely reversible. The red jumper is just connecting the hot leads. You can use anything for a signal source, I'm using a bass at the moment. Using the jumpers, it is possible to quickly assemble all sorts of configurations for testing, without soldering. You can also solder permanent assemblies and then remove them. One drawback is that any noise sources in the vicinity, such as fluorescent lights, are picked up very strongly.

Questions or Inquiries?
Just want to say Hello? Sign the .