July 20, 2020
Radiatabacker Part IIb
July 20, 2020
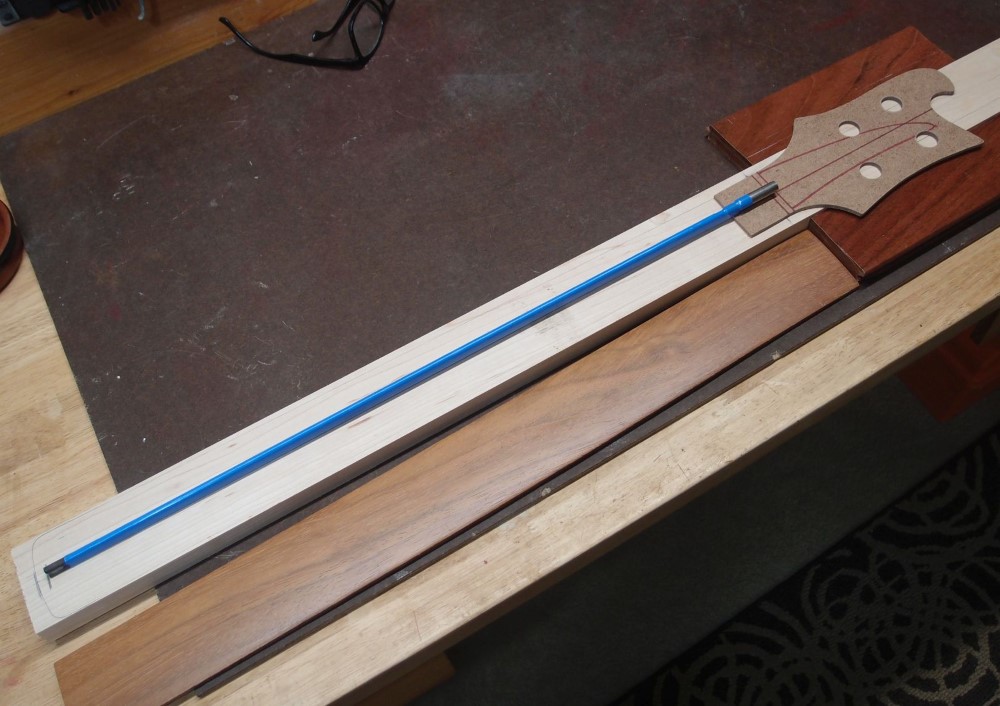
This is what I've settled on for the neck. The main part is plain maple from Home Depot. The headstock wings are leftover floorboard from the upright project, Brazilian Cherry. The fretboard is also Brazilian Cherry. The truss rod is 540mm, which will require a 21 fret neck. Or I could cut it down a bit and weld the ends back together, but that's more work.
I got the edges of the wing pieces straight and true. Apart from that, I'm taking an easy day here at the lab, just cleaning up and cogitating. My arm is still tired from yesterday, and I definitely don't want to push into Carpal Tunnel Syndrome.
Update:
Change of plans, I'm not going to use the Brazilian Cherry for the headstock wings. The stuff is insanely hard, and gluing it up to the maple and then trying to make a flat surface is likely to be a problem. I got one piece of it dressed up, and that was just too much work. I'll just make the wings maple.
Also, after studying the geometry on the Ric, I need to add a shim under the fretboard to raise it up and give a better break-over angle at the nut. I did this on a previous Ric project.
Alternatively, I could angle the headstock with a scarf joint, but the flatter the angle, the longer the joint becomes. Or I could get a thicker piece of wood and carve it out, but I hate paying ridiculous "luthiery" prices for what turns out to be inferior material. I could also glue up two pieces of radiata, that would give the necessary depth, and then the whole thing would be radiata, which would be neat.
