Side Markers

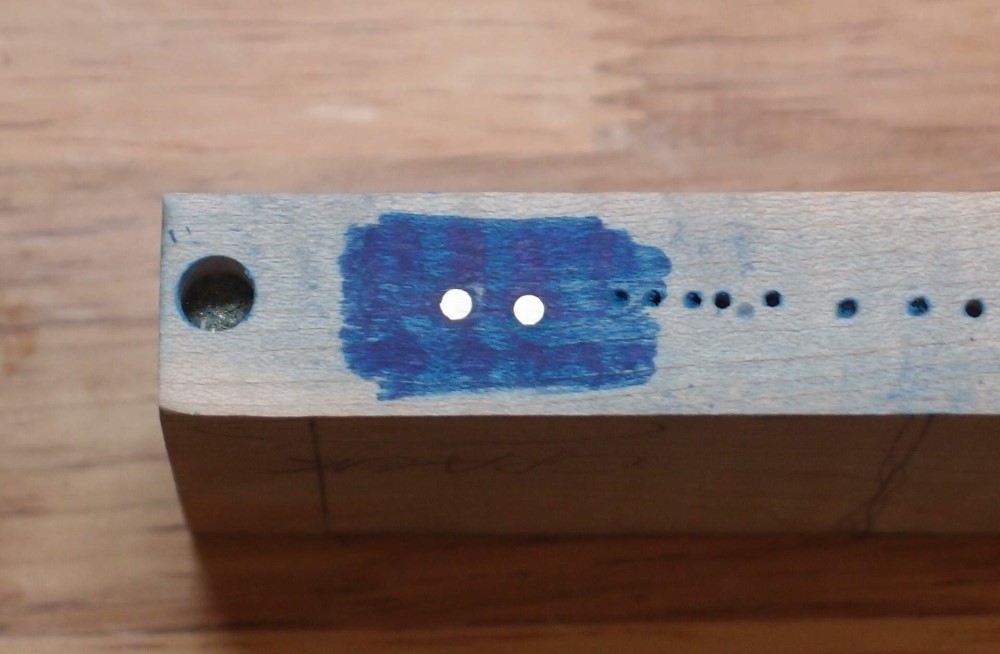
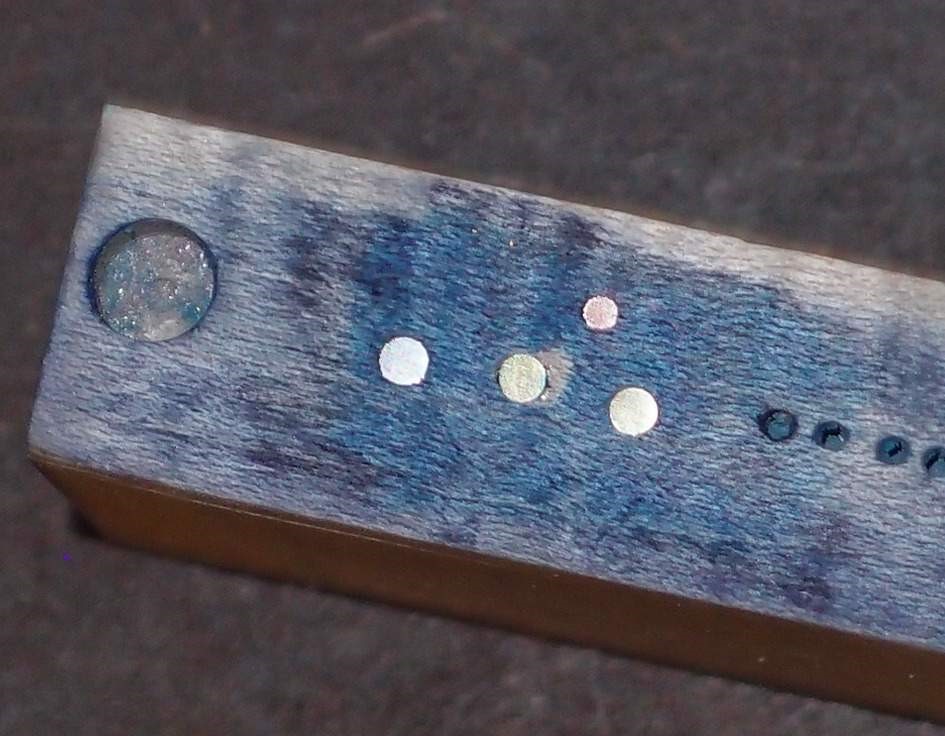
In addition to my alternative marker dots, I'm also looking for 'non-luthier' alternatives to side markers, and here is one. These are bits of 3/32" brass rod, set in a piece of scrap maple as a test. Foot-long lengths of 3/32" and 1/16" rod are available from hobby shops for around a buck; they are used by model builders. I pre-drilled the holes, tapped the rod in like a nail, and cut it off slightly proud. Working the brass is just like dressing fret ends, in fact, you could do it at the same time. I also found some aluminum rods on eBay. At the size of a dot, aluminum should come out looking just like pearl. This is like Danelectro used to do back in the '60s. Steel would be much harder to work, and also prone to corrosion, so I wouldn't use ordinary nails, but small brass ones would work. Always pre-drill hardwoods. I pushed in a dimple with a pointed scribe, then deepened it with a spring punch before drilling. Chuck the drill bit so just a 1/4" protrudes. That will keep it from flexing, which can be a problem at these sizes.

This is what Danelectro was using, has to be. In the 60s, this stuff was used for electrical wire, you could buy it anywhere. Caused more than a few fires, mainly because people treated it like copper, and you can't do that.
Don't know why I didn't think of this before. I was fixated on the word 'rod', and forgot that at these sizes, 'wire' is more appropriate. ( Now let's see if there are any adults on this board who can pass that one by ... heh heh ... ' he said ... ')
Speaking of copper, I have lots of 14 gauge copper scrap from house-wiring, so I can add that to my luthiery kit as well. Copper should look nice under a clear coat to prevent oxidation, or let it turn green - why not?
So, from the hardware/hobby store:
- brass (golden)
- aluminum (silvery)
- copper (coppery)
- 'aged' copper (green)
- wood dowels & toothpicks
and in real luthiery supplies:
- white plastic
- black plastic
- glow-in-the dark plastic
- real pearl
BTW:
- 1/16" = 0.06250" ~ 14 gauge wire = 0.06410" diameter ( exact drill size 51, 0.064" )
- 5/64" = 0.07813" ~ 12 gauge wire = 0.08080" diameter ( exact drill size 46, 0.081" )
- 3/32" = 0.09375" ~ 10 gauge wire = 0.10190" diameter ( exact drill size 38, 0.102" )
These are all common drill sizes, and the wire should be a good press-fit - no glue needed. The exact-size bits are something only a machinist would have, and not necessary for this, I just thought I'd add them.
Another idea I've seen is to use those little red straws that come with spray cans and fill the hole with white spackle or caulk, for a little bull's-eye. I just measured one, and it comes out to 0.0845" ~ 5/64".
Aluminum welding rod also comes in 1/16" and other sizes, if you know someone you can get a couple of pieces from, otherwise it is only sold in bulk. In fact, almost anything that will match up with a 1/16" or 5/64" or 3/32" drill bit.
So many choices, and so many of them cheap and easy.
Real pearl is a waste of money - they're expensive and too small to tell the difference.

In addition to the 3/32" brass, I've added a 3/32" aluminum, and a 1/16" copper that I scrounged out of the electrical parts box. Just drill the hole maybe 1/4" deep, and push in as much wire as will go. No messy glue. Clip it off, file smooth, and polish.
Mind you, this picture is in no way finish-quality. I just drilled some quick holes in a piece of maple scrap, jammed some wire in, and gave it a cursory smoothing. Inked the wood with a Sharpie for contrast. On a guitar, I would do a much better job.
I really like the copper. Going to Home Depot tomorrow to see what I can find. The website shows solid bare copper wire 10 gauge for 39 cents a foot. Home Depot is the best luthiers supply on earth.
I also got some 1/8" aluminum. That might look interesting on the front of a fretboard, instead of regular dots.


Questions or Inquiries?
Just want to say Hello? Sign the .