Fretboard Dots
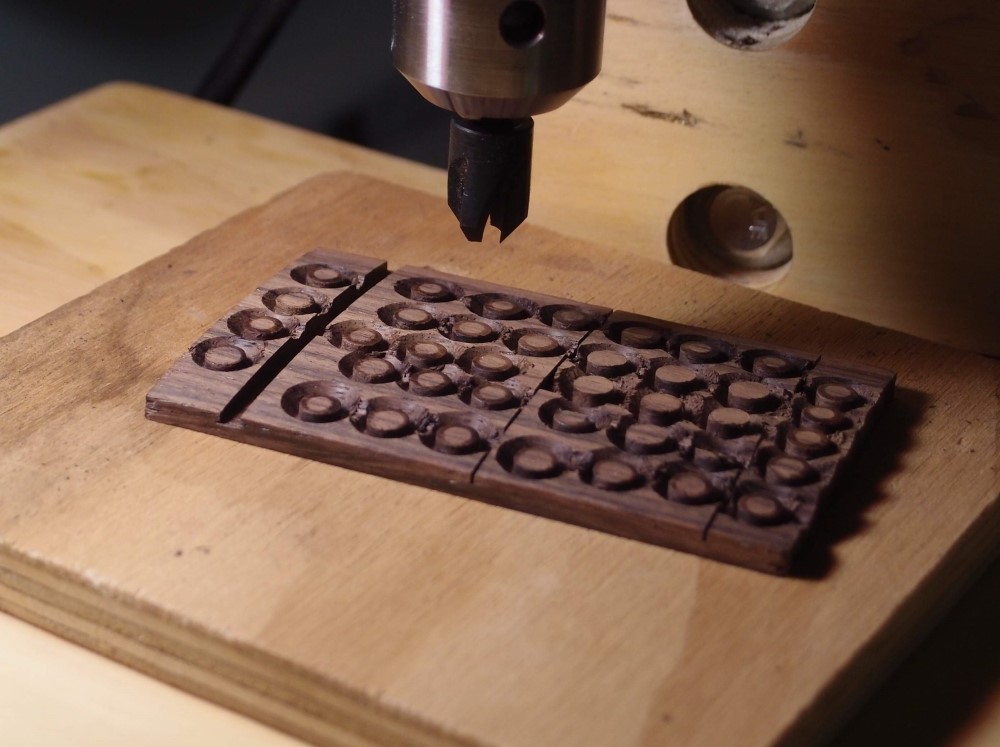
I make my own marker dots with a 1/4" plug cutter and whatever scrap I have around. I've made every color of plastic, maple, rosewood, purpleheart, and others. I just ordered a sheet of 3mm ABS for five bucks that will produce a lot more dots than you could buy for that much, and also better ones. Many of the 1/4" dots you get are not really 1/4", thanks to the @%^#$ metric system. You make 1/4" holes, and then the dots are undersized. I don't have a 6mm Forstner bit. The dots I make actually have to be tapped into the holes, they're that good a fit.
A piece of scrap and a few minutes work, and you can make some nice dot markers. These rosewood ones look great on a maple fretboard, they darken under a finish and give a nice woody look. I even align the grain when installing them. Likewise, maple markers look great on a rosewood 'board. You can see why I say the process is wasteful, each dot sits in a much larger crater, but it's just scrap that would be thrown away.
If you drill the material clear through, you end up having to pry the dot out of the bit, which is a pain. Much easier to drill them part-way like this, and then release them by sanding off the back, using tape on the front to keep them from flying away. With thinner plastic materials, you may have no choice but to drill right through.
No precision is needed here. When installing, drill your holes with a Forstner bit such that the dots will protrude, then level them with a file. The thicker you can make your dots, the less precise you can be drilling the holes for them. StewMac's pearl dots are very thin and fussy to install.
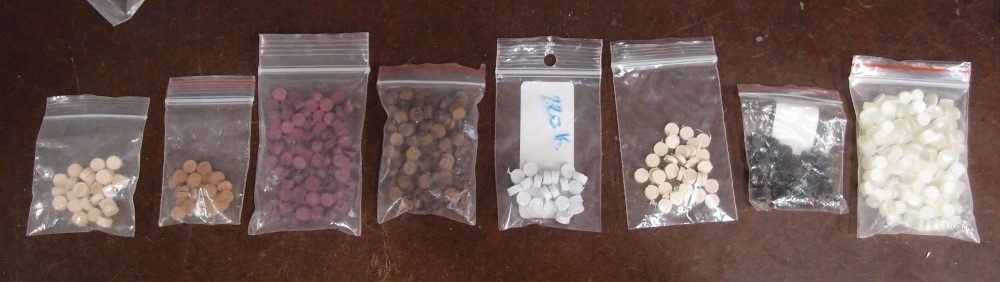
Lots of dots, left to right:
- maple
- bubinga or jatoba
- purpleheart
- rosewood
- white plastic
- tan plastic
- black plastic
- pearl
This is a variety that you simply can't buy. And I have enough raw material to make many more.
Just fooling around, I took some scrap bits of white pickguard plastic and drilled some 1/4" dots from it with the plug cutter. This plastic didn't drill very cleanly, it is too soft. It also doesn't file very well.
Then I took a 3mm sheet of black ABS plastic and drilled a few dots. They came out very clean, and file down nice and smooth with no marks. I can make black dots from this piece of plastic for many years.
ABS is definitely the stuff, it is hard enough to make nice clean dots. ABS is also available in white and a few other colors, but I have a lifetime supply of pearl dots, so I don't see the point. Black dots on light fretboards, pearl dots on dark fretboards, good enough for me. I also have rosewood, purpleheart, walnut, and maple dots.
A 1/4" plug cutter is a good investment, or 5/16", or whatever size you want, along with a matching Forstner bit to make the holes.
Dots must be the biggest ripoff in the entire luthiery business. Get a plug cutter and make your own. If I had to buy the dots for the EUB fretboard above, it would have added over $30 to the cost of a free piece of wood !!!


Questions or Inquiries?
Just want to say Hello? Sign the .